Creating a Google Extension with Option Page Tutorial
In this tutorial, you will learn how to Create a Google Extension with an Options Page. This tutorial aims to provide IT/CS students and new programmers with a reference for learning to create a browser extension. Here, a step-by-step tutorial with snippets is provided to easily understand. A sample Google Extension source code that demonstrates and achieves the main goal of this tutorial is also provided and is free to download.
What is the Purpose of the Options Page in Google Extension?
The Options Page in Google Extension is basically used or implemented by the developer to allow the user to manage the configuration of the extension. With this, developers can provide their users with an extension settings configuration page on the front end.
How to create an Options Page in Google Extension?
To create an Options Page UI/UX in your google extension, you will need to add the following on your manifest.json file.
- "options_ui": {
- "page": "options.html", // the filename of the option page interface script
- "open_in_tab": false // Opens the Option Page in a New Tab
- },
The above example results in an options page that displays the interface using the options.html file and displays it in an embedded window on the extension page. If change the open_in_tab value to true, the Options Page will be shown in a new tab.
How to save data from the Options Page?
Since Option Page is commonly used to maintain the extension's settings, using chrome.storage.sync API, we can store the configuration data on the browser. This API will require you to add storage in permissions value in your manifest.json file.
Example
manifest.json
- {
- ...
- "options_ui": {
- "page": "options.html",
- "open_in_tab": false
- },
- "permissions" : ["storage"],
- ...
- }
options.html
option-script.js
- window.load = function(){
- chrome.storage.sync.get("config1", function(items){
- if(!!items.config1)
- document.getElementById('config1').value = items.config1;
- })
- document.getElementById('update').addEventListener('click', function(){
- chrome.storage.sync.set({config1: document.getElementById('config1').value}, function(){
- alert("Extension settings has been updated successfully.")
- })
- })
- }
Sample Google Extension Source Code
I have also created a working sample Google Extension that demonstrates the main objective of this tutorial which is to have an Options Page for the extension's settings configuration. You can download the source code zip file by clicking the download button located below this article.
About the Sample Google Extension
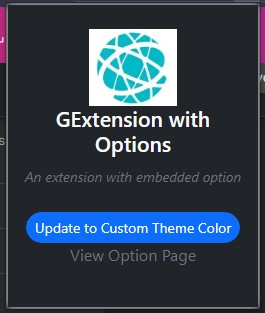
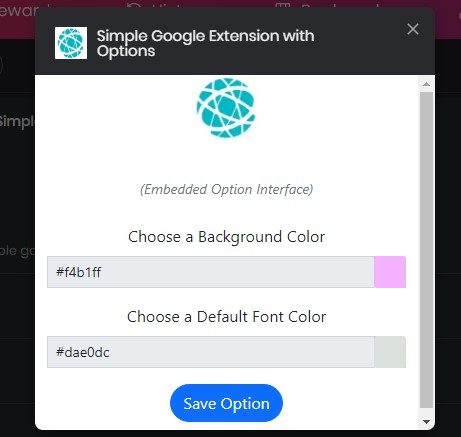
The sample google extension with an options page source code results in an extension that allows the user to set the custom theme colors of the websites. On the options page interface, there are 2 inputs with a color picker selection. One of the color picker inputs is for the background color of the website while the other one is for the font color of the website. The extension has a popup interface that contains some information about the extension and a button to redirect to the extension's page and a button for updating the current browsed website theme based on the saved configuration on the options page.
Snapshots
Here are the snapshots of the sample Google Extension with Option Page that I provided.
Extension's Popup Interface
Extension's Options Page Interface
DEMO VIDEO
That's the end of this tutorial. I hope this Creating a Google Extension with an Options Page Tutorial will help you with what you are looking for and that you'll find this useful for your current and future projects.
Explore more on this website for more Tutorials and Free Source Codes.
Happy Coding =)
Add new comment
- 272 views


