Android Custom Dialog Tutorial using Basic4Android
Submitted by donbermoy on Monday, January 27, 2014 - 18:06.
Hi! I will introduce another tutorial in Dialogs using Basic4Android, the Custom Dialog. A custom dialog refers to be in the customization of your dialog that you will going to create on your own.
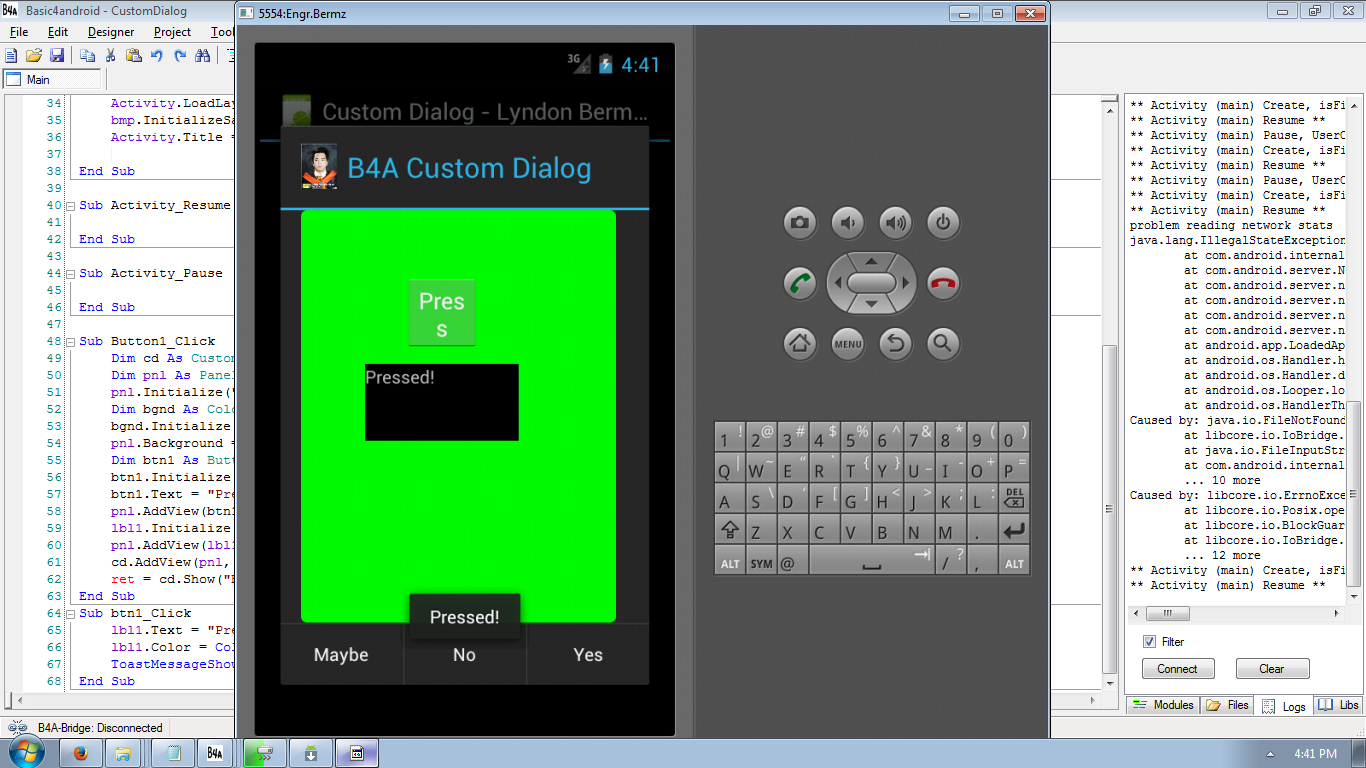
First, you need to create two buttons and named it Button1 and btn1, and also one label and named it as lbl1. Next, named your layout name as "Main". Follow the image below for the abstract design.
 Declare first your variable in the Sub_Global like this:
The code above means that by clicking our btn1, the lbl1 label will turned out to be displayed to "Pressed" and it will have a black color, and also it will have a msgbox that will display "Pressed".
Best Regards,
Engr. Lyndon Bermoy
IT Instructor/System Developer/Android Developer/Freelance Programmer
If you have some queries, feel free to contact the number or e-mail below.
Mobile: 09488225971
Landline: 826-9296
E-mail:[email protected]
Add and Follow me on Facebook: https://www.facebook.com/donzzsky
Visit and like my page on Facebook at: https://www.facebook.com/BermzISware
 Declare first your variable in the Sub_Global like this:
- Sub Globals
- 'These global variables will be redeclared each time the activity is created.
- 'These variables can only be accessed from this module.
- Dim Button1 As Button
- Dim bmp As Bitmap
- Dim lbl1 As Label
- Dim btn1 As Button
- End Sub
Note:
bmp is our variable for Bitmap because I wanted to have an icon to my Custom Dialog. lbl1 our variable for Label. Button1 - our variable for Button. btn1 - our 2nd variable for our Button. Here's the full code for this tutorial:- Sub Process_Globals
- 'These global variables will be declared once when the application starts.
- 'These variables can be accessed from all modules.
- End Sub
- Sub Globals
- 'These global variables will be redeclared each time the activity is created.
- 'These variables can only be accessed from this module.
- Dim Button1 As Button
- Dim bmp As Bitmap
- Dim lbl1 As Label
- End Sub
- Sub Activity_Create(FirstTime As Boolean)
- 'Do not forget to load the layout file created with the visual designer. For example:
- 'Activity.LoadLayout("Layout1")
- Activity.LoadLayout("Main")
- bmp.InitializeSample(File.DirAssets, "bermoy.jpg",48,48)
- Activity.Title = "Custom Dialog - Lyndon Bermoy"
- End Sub
- Sub Activity_Resume
- End Sub
- Sub Activity_Pause (UserClosed As Boolean)
- End Sub
- Sub Button1_Click
- Dim cd As CustomDialog
- Dim pnl As Panel 'we will initialize Panel to put our CustomDialog there
- pnl.Initialize("pnl")
- Dim bgnd As ColorDrawable 'bgnd is the variable for the background
- bgnd.Initialize(Colors.Green, 5dip) 'we initialized background color as Green
- pnl.Background = bgnd 'the panel is now equal to the background color as Green
- Dim btn1 As Button
- btn1.Initialize("btn1")
- btn1.Text = "Press me"
- pnl.AddView(btn1, 80dip, 50dip, 60dip, 60dip) 'size of our panel
- lbl1.Initialize("")
- pnl.AddView(lbl1, 50dip, 120dip, 120dip, 60dip)
- cd.AddView(pnl, 5%x, 0%y, 77%x, 70%y) 'sizing relative to the screen size is probably best
- ret = cd.Show("B4A Custom Dialog", "Yes", "No", "Maybe", bmp)
- End Sub
- Sub btn1_Click
- lbl1.Text = "Pressed!"
- lbl1.Color = Colors.Black
- ToastMessageShow("Pressed!", False)
- End Sub
Note:
cd - our variable used for Custom Dialog pnl - we will initialize Panel to put our CustomDialog there bgnd - bgnd is the variable for the background color bgnd.Initialize(Colors.Green, 5dip) - we initialized background color as Green, 5dip here is the corner radius of the background color. pnl.Background = bgnd - 'the panel is now equal to the background color as Green btn1.Text = "Press me" - if our Button1 is clicked then the btn1 text will be equal to "Press me" pnl.AddView(btn1, 80dip, 50dip, 60dip, 60dip) - it will add a view to the panel with btn1 there, 80dip as size of the left view, 50dip size of the top view, 60dip as the height, and 60dip as the width of the panel. lbl1.Initialize("") - we initialize that label1 is said to be blank. pnl.AddView(lbl1, 50dip, 120dip, 120dip, 60dip) - it will add a view to the panel with lbl1 there, 50dip as size of the left view, 120dip size of the top view, 120dip as the height, and 60dip as the width of the panel. cd.AddView(pnl, 5%x, 0%y, 77%x, 70%y) - sizing relative to the screen size is probably best. It adds a custom layout view, most probably a Panel to the Custom Dialog, 5%x as size of the left view, 0%y size of the top view, 77%x as the height, and 70%y as the width of the panel. ret = cd.Show("B4A Custom Dialog", "Yes", "No", "Maybe", bmp) - this syntax will trigger the Custom Dialog to show and choose from Yes, No, or Maybe.- Sub btn1_Click
- lbl1.Text = "Pressed!"
- lbl1.Color = Colors.Black
- ToastMessageShow("Pressed!", False)
- End Sub
Add new comment
- 230 views

