Creating Sleepy Face in Java
Submitted by mehfuza on Friday, September 6, 2013 - 01:04.
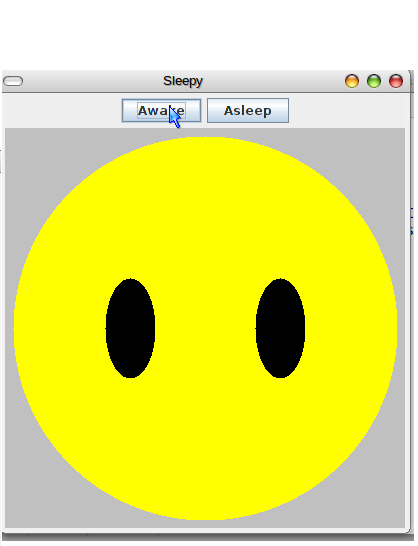
In this tutorial we will learn to create a simple face(only eyes) which change when sleep button or wakeup button is clicked. This Application has two JButtons and a Panel for displaying the face. This Application handles Action Events for the buttons. In all we will create three class to make the design simple and clear.
Step 3:
Finally the paintComponent() method is used to draw the face to the panel(component). fillOval() method draws an oval for the face and eyes are drawn based on the value of variable awake which is changed when a button is clicked. If awake is true then it draws the open eyes using fillOval() else it draws the closed eyes using using fillRect() method. First two arguments for this method are x and y co-ordinates of the point from where to start drawing and next two are width and height.
Step 2:
Then define constructor for the this panel in which we create two buttons as follows. ActionListener's object is created and added at the same time.
Step 3: Set Layout and add buttons
Buttons are added next to each other using FlowLayout. buttonPanel is added at the top and face panel is added is added at the center using the BorderLayout.
Part 1: Creating a Class FacePanel for drawing face
Step 1: This class is used to draw the face based on whether the face is awake or asleep. For that we require a boolean variable awake which is set false initialy. In the constructor of this class background color and size of panel is set as follows.
Step 2:
Next, the setAwake() method is used to set the variable awake and call the repaint method to redraw the face. This method is when the button is clicked.
- public void setAwake(boolean awakeAsleep) {
- awake = awakeAsleep; // remember expression on face
- repaint(); // redraw it with new value
- }//end setAwake
- super.paintComponent(g); // MUST be first line
- //--- draw head
- g.fillOval(8, 8, 384, 384);
- //--- draw eyes
- if (awake) {
- g.fillOval(100, 150, 50, 100); // left eye
- g.fillOval(250, 150, 50, 100); // right eye
- }
- else {
- g.fillRect(50 , 200, 100, 4); // left eye
- g.fillRect(250, 200, 100, 4); // left eye
- }
- }
Part 2: Defining a class for adding buttons and face
We create another class which extends panel and add two buttons asleep and awake to it and then add Face Panel. ActionListener for button is also included which changes the calls the setAwake() method with true or false parameter depending upon which button was clicked. Step 1: First create object of FacePanel so that we can add it to this panel.- private FacePanel face = new FacePanel();
- SleepyPanel() {
- //--- Create some buttons
- awakeButton.addActionListener(
- //========================================= listener
- face.setAwake(true);
- }//end listener
- }
- );
- asleepButton.addActionListener(
- //========================================= listener
- face.setAwake(false);
- }//end listener
- }
- );
- buttonPanel.add(awakeButton);
- buttonPanel.add(asleepButton);
- //--- Set layout and add buttons and face
Part 3: Create a Sleep class and define main() method
A JFrame object "window" is created and an object of SleepPanel class is created and added to this frame. pack() method is used to set the size of the frame as required by the components to fill the frame.- public class Sleep {
- //================================================== method main
- window.getContentPane().add(new SleepyPanel()); //get the content pane to add the component
- window.pack();
- window.show();
- }//end main
- }
Add new comment
- 45 views