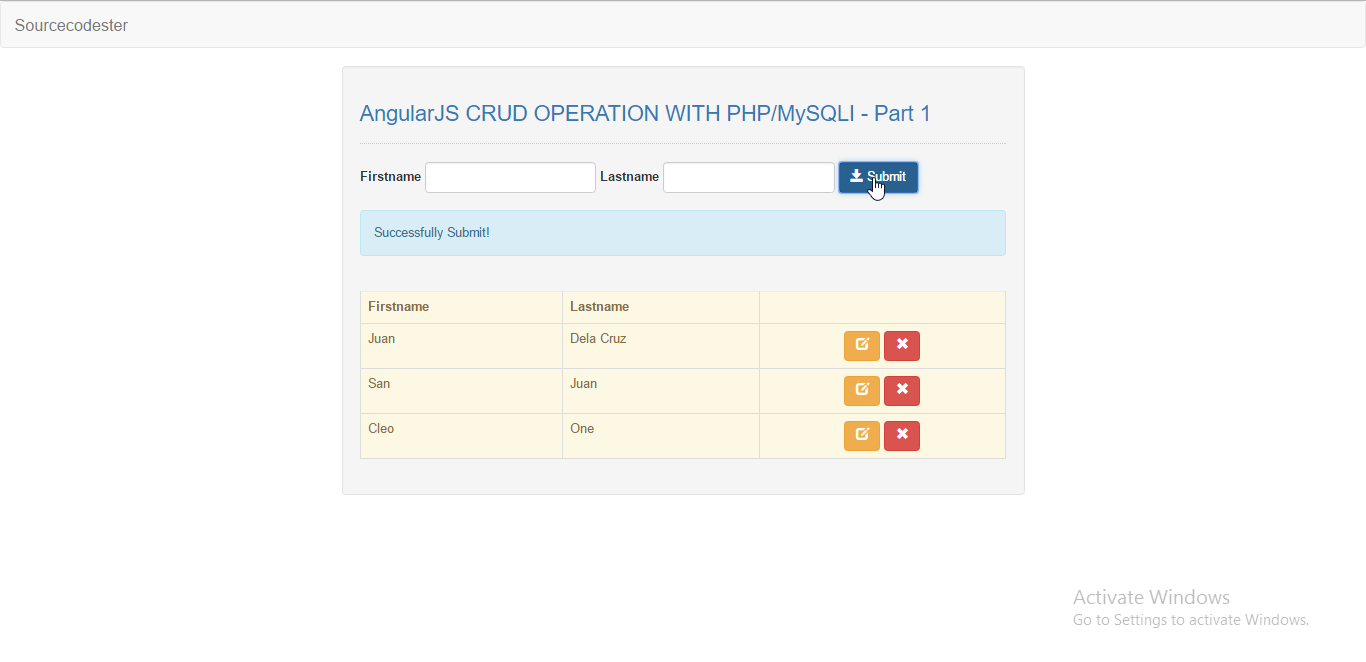
AngularJS CRUD Operation With PHP/MySQLi - Part 1
Submitted by razormist on Tuesday, March 28, 2017 - 14:48.
In this tutorial we will use AngularJS for CRUD (create, read) Operation with PHP/ MySQLi as a backend development. AngularJs is widely used in developing modern website because of its easy syntax construct and convenient in time developing. It is a library from javascript that compressed and simplified into a whole new level of programming technique. By the way this tutorial is consist of two parts,for we will tackle only about create and select on AngularJS with PHP database. So let's see how its done.
Creating the database
First, we will create the database, To create a database open the database server such as wamp, xamp, etc. After that go to phpMyadmin then click database, and name your database as "db_angular". Then click SQL and copy and paste the code below and now run the sql command.
Coding the Create Function
To make the application work, first we will make the php script for the create function, Copy/paste the code below then save it as "insert.php"
Coding the Read Function
To display the record from the database we will need the php script read function. To do that copy/paste the code I provided below and save it as "select.php"
Angular JS Directives
This is where all the logic comes, and where application work perfectly. Just simply copy/paste the code then name it as "app.js" and save it into the js directory.
There you have it we create the AngularJs CRUD (create, read) Operation simply as that. For the next part of the tutorial we will tackle on how to update and delete the data so just stay tuned to this site. I hope that this simple tutorial help you improve to your programming carrier. Enjoy Coding!!
Creating the database connection
To create the connect, just simply copy/paste the code that I provided below and save it as "connect.php"
Creating the Mark Up
To create the interface of the application, just copy/paste the code below then name it "index.php"
- <!DOCTYPE html>
- <html lang = "en">
- <head>
- <script src = "js/angular.js"></script>
- <script src = "js/app.js"></script>
- <meta charset = "UTF-8" name = "viewport" content = "width=device-width, initial-scale=1"/>
- </head>
- <body ng-app = "myModule" ng-controller = "myController">
- <nav class = "navbar navbar-default">
- <div class = "container-fluid">
- <a class = "navbar-brand" href = "https://sourcecodester.com" >Sourcecodester</a>
- </div>
- </nav>
- <div class = "col-md-3"></div>
- <div class = "col-md-6 well">
- <h3 class = "text-primary">AngularJS CRUD OPERATION WITH PHP/MySQLI - Part 1</h3>
- <hr style = "border-top:1px dotted #ccc;">
- <form>
- <div class = "form-inline">
- <label>Firstname</label>
- <input type = "text" class = "form-control" ng-model = "firstname" id = "firstname"/>
- <label>Lastname</label>
- <input type = "text" class = "form-control" ng-model = "lastname" id = "lastname"/>
- <button type = "button" class = "btn btn-primary form-control" ng-click = "insertData()"><span class = "glyphicon glyphicon-save"></span> Submit</button>
- <br /><br />
- <div ng-model = "message" ng-show = "msgBox" class = "alert alert-info">{{message}}</div>
- </div>
- </form>
- <br />
- <table class = "table table-responsive table-bordered alert-warning">
- <thead>
- <tr>
- <th>Firstname</th>
- <th>Lastname</th>
- <th></th>
- </tr>
- </thead>
- <tbody>
- <tr ng-repeat = "member in members">
- <td>{{member.firstname}}</td>
- <td>{{member.lastname}}</td>
- <td><center><button class = "btn btn-warning"><span class = "glyphicon glyphicon-edit"></span></button> <button class = "btn btn-danger"><span class = "glyphicon glyphicon-remove"></span></button></center></td>
- </tr>
- </tbody>
- </table>
- </div>
- </body>
- </html>
- <?php
- require_once 'connect.php';
- $firstname = $data->firstname;
- $lastname = $data->lastname;
- $conn->query("INSERT INTO `member` (firstname, lastname) VALUES('$firstname', '$lastname')") or die(mysqli_error());
- ?>
- <?php
- require_once 'connect.php';
- while($row = $query->fetch_array()){
- $data[] = $row;
- }
- ?>
- var app = angular.module("myModule", [])
- .controller("myController", function($scope, $http, $timeout){
- $http.get('select.php').then(function(response){
- $scope.members = response.data;
- });
- $scope.insertData = function(){
- $http.post("insert.php", {firstname: $scope.firstname, lastname: $scope.lastname})
- .then(function(){
- $scope.message = "Successfully Submit!";
- $scope.msgBox = true;
- $scope.firstname = "";
- $scope.lastname = "";
- $timeout(function(){
- $scope.msgBox = false;
- }, 2000);
- $scope.selectData();
- });
- }
- $scope.selectData = function(){
- $http.get('select.php').then(function(response){
- $scope.members = response.data;
- });
- }
- });
Add new comment
- 280 views

