Android Oscillator Application Using Basic4Android - Tutorial Part 1
Submitted by donbermoy on Thursday, January 16, 2014 - 23:12.
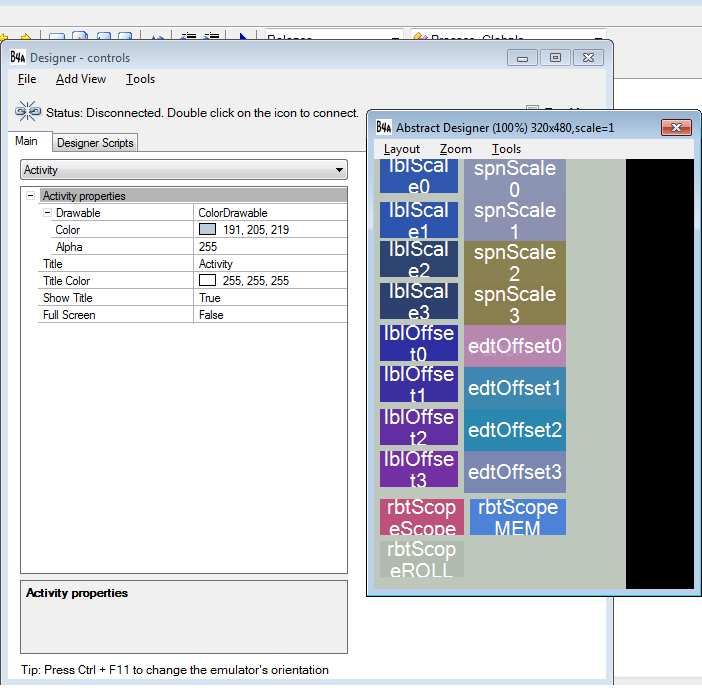
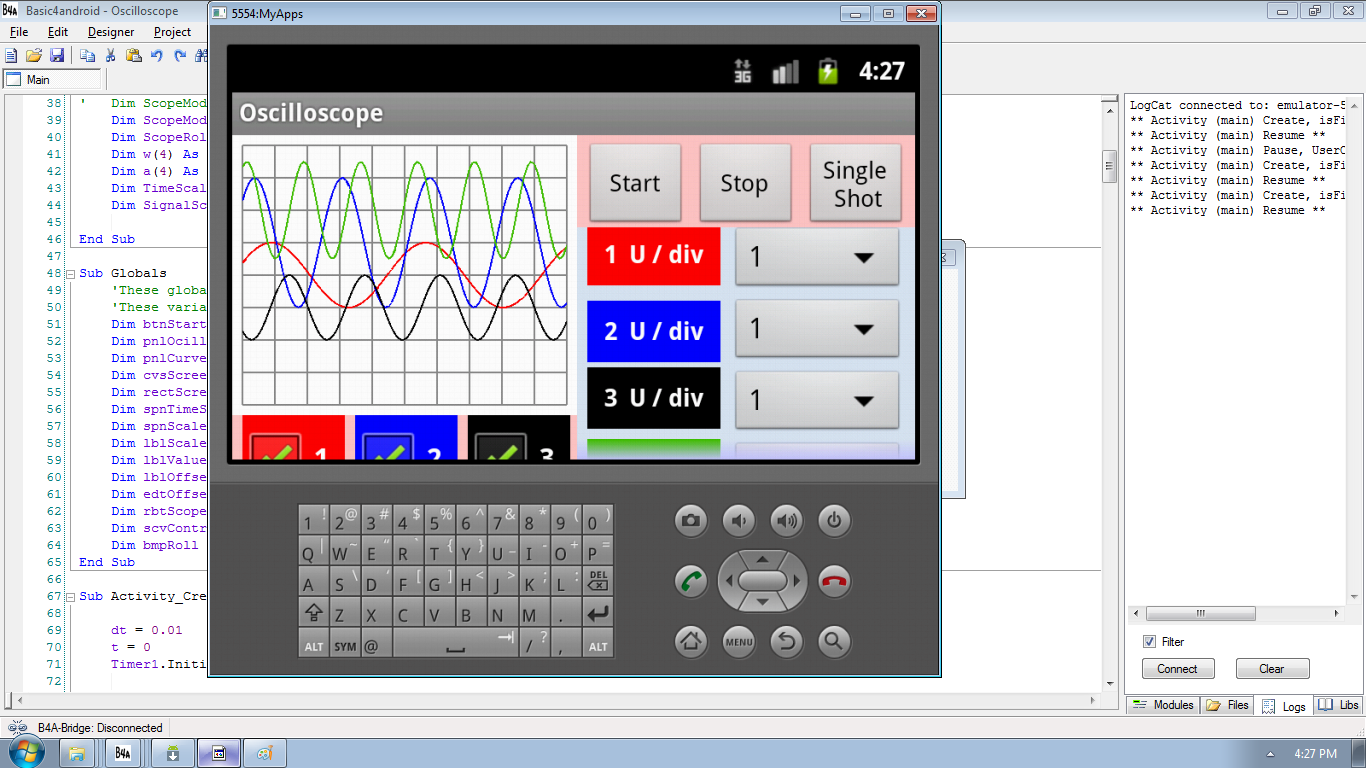
In this tutorial, I will introduce the power of Basic4Android that creates an Oscilloscope Application in Android. The first thing that you will do is to create a design like the Image below. Have a one Panel and named it as Panel1, an 8 Label and named it as lblScale0 label it as “1 U / div”, lblScale1 label it as “2 U / div”, lblScale2 label it as “3 U / div”, lblScale3 label it as “4 U / div”, lblOffset0 label it as ” 1 U Offset”, lblOffset1 label it as ” 2 U Offset”, lblOffset2 label it as ” 3 U Offset”, lblOffset3 label it as ” 4 U Offset”. Have also 4 Spinner named spnScale0, spnScale1, spnScale2, spnScale3 for Scaling. Add also 4 EditText named edtOffset0, edtOffset1, edtOffset2, edtOffset3 for our Offset. Have also 3 RadioButton and named it as rbtScopeScope, rbtScopeMEM, rbtScopeRoll. Here’s the abstract design of the Oscillator. It must be in  Now we will code first the Process Global Procedures. Initialize the variables like below:
Now that all the variables in the Global Process had been initialized, we will also initialized another variables for Sub Global Procedure like this one below:
Note that we initialized 3 buttons above named btnStart, btnStop, btnSingleShot. Next, before we go to the Activty_Create, we have to code first the sub procedures before putting it to the form load.
The first sub procedure is for drawing the curve for the Oscillator. Here’s the code below:
After Drawing the curves, we will also add a sub procedure for initializing the color of our curves. Follow the code below:
Next we will create also a sub procedure for initializing the list of items in the Spinner. The Spinner can choose the Time Scale, Signal Scale, and the Scaling of Curves. You will code like this one below:
Now our Spinners can now have the values of the curve when choosing its scale. Next, we shall also initialize the code for calculating the values of our codes. Why? Because this will determine the exact rate of scaling in our Oscilloscope. Here’s the code:
After calculating the value of our curves, we will now proceed to get the values of these four curves. Type the code below:
Now, one of the important parts is displaying the values of our codes but I made it in a Sub Procedure. Here’s the code below:
The first curve will display in the label of lblValue0, 2nd in the lblValue1.Text, and so on and so forth.
As you can see, we just displayed the value of the curves in the Labels but it doesn’t change. In our Sub Global we used a Timer named Timer1. And that’s it! It will make the value of the curves into the Labels to change its value. Follow to type the following code below:
This is it for now. I will continue the code tomorrow for Activity_Create (our Form_Load), btnStart_Click, btnStop_Click, btnSingleShot_Click, and etc to complete our Oscillator Application.
Best regards,
Engr. Lyndon R. Bermoy
IT Instructor/System Developer/Android Developer
STI College - Surigao City
09126450702
[email protected]
Follow and add me in my Facebook Account: https://www.facebook.com/donzzsky
Visit my page on Facebook at: https://www.facebook.com/BermzISware
SupportedOrientations: landscape.
 Now we will code first the Process Global Procedures. Initialize the variables like below:
- Sub Process_Globals
- 'These global variables will be declared once when the application starts.
- 'These variables can be accessed from all modules.
- Dim Timer1 As Timer
- Type Curves (Name As String, Color As Int, Width As Float, Scale As Double, Offset As Double, Draw As Boolean)
- Dim CurveVal(4, 101) As Double
- Dim ScreenX0, ScreenX1, ScreenY0, ScreenY1, ScreenW, ScreenH, Border As Int
- Dim GridX0, GridX1, GridY0, GridY1, GridYm, GridW, GridH, Div As Int
- Dim NbDivX, NbDivY As Int
- Dim ScreenCol, GridLineCol As Int
- Dim t, dt As Double
- Dim dx, xx, cx As Float
- Dim ii As Int
- Dim CurveI As Int ' curve index
- Dim Curve(4) As Curves
- Dim CurvesI(4) As Int
- Dim CurvesNb As Int : CurvesNb = 3
- Dim CurvesNbDisp As Int
- Dim y1(4) As Float
- Dim y2(4) As Float
- Dim SingleShot As Boolea : SingleShot = False
- Dim Stopped As Boolean : Stopped = True
- Dim ScopeMode As String :ScopeMode = "ROLL"
- Dim ScopeRolling As Boolean : ScopeRollin= False
- Dim w(4) As Double
- Dim a(4) As Double
- Dim TimeScale(10) As Double
- Dim SignalScale(10) As Double
- End Sub
- Sub Globals
- Dim btnStart, btnStop, btnSingleShot As Button
- Dim pnlOcilloscope, pnlScreen, pnlGraph, pnlCursor, pnlControl As Panel
- Dim pnlCurveTools, pnlDispValues As Panel
- Dim cvsScreen, cvsGraph, cvsCursor As Canvas
- Dim rectScreen, rectGrid As Rect
- Dim spnTimeScale As Spinner
- Dim spnScale0, spnScale1, spnScale2, spnScale3 As Spinner
- Dim lblScale0, lblScale1, lblScale2, lblScale3 As Label
- Dim lblValue0, lblValue1, lblValue2, lblValue3 As Label
- Dim lblOffset0, lblOffset1, lblOffset2, lblOffset3 As Label
- Dim edtOffset0, edtOffset1, edtOffset2, edtOffset3 As EditText
- Dim rbtScopeScope, rbtScopeMEM, rbtScopeROLL As RadioButton
- Dim scvControl As ScrollView
- Dim bmpRoll As Bitmap
- End Sub
- Sub DrawCurves
- Dim i, j As Int
- Dim r1, r2 As Rect
- Dim x, yy1(4), yy2(4) As Float
- If SingleShot = False Then
- Select ScopeMode
- Case "MEM"
- r1.Initialize(xx, 0, xx + dx, GridH)
- cvsGraph.DrawRect(r1, Colors.Transparent, True, 1)
- Case "ROLL"
- If ScopeRolling = True Then
- cvsGraph.DrawRect(rectGrid, Colors.Transparent, True, 1)
- For i = 0 To CurvesNb
- If Curve(i).Draw = True Then
- yy1(i) = GridYm + (-Curve(i).Offset - CurveVal(i, 0)) * Curve(i).Scale
- For j = 1 To 99
- x = j * dx
- yy2(i) = GridYm + (-Curve(i).Offset - CurveVal(i, j)) * Curve(i).Scale
- cvsGraph.DrawLine(x - dx, yy1(i), x, yy2(i), Curve(i).Color, Curve(i).Width)
- yy1(i) = yy2(i)
- Next
- End If
- Next
- End If
- End Select
- End If
- For i = 0 To CurvesNb
- If Curve(i).Draw = True Then
- y2(i) = GridYm + (-Curve(i).Offset - CurveVal(i, ii)) * Curve(i).Scale
- If ii > 0 Then
- cvsGraph.DrawLine(xx - dx, y1(i), xx, y2(i), Curve(i).Color, Curve(i).Width)
- End If
- y1(i) = y2(i)
- End If
- Next
- pnlGraph.Invalidate
- DoEvents
- End Sub
- Sub InitCurves
- Curve(0).Color = Colors.Red
- Curve(1).Color = Colors.Blue
- Curve(2).Color = Colors.Black
- Curve(3).Color = Colors.RGB(64, 192, 0)
- Curve(0).Width = 1dip
- Curve(1).Width = 1dip
- Curve(2).Width = 1dip
- Curve(3).Width = 1dip
- Curve(0).Scale = 20
- Curve(1).Scale = 20
- Curve(2).Scale = 20
- Curve(3).Scale = 20
- Curve(0).Offset = 0
- Curve(1).Offset = 1
- Curve(2).Offset = -1
- Curve(3).Offset = 2
- Curve(0).Draw = True
- Curve(1).Draw = True
- Curve(2).Draw = True
- Curve(3).Draw = True
- End Sub
- Sub InitSpinners
- Dim i As Int
- TimeScale(0) = 10
- TimeScale(1) = 5
- TimeScale(2) = 2
- TimeScale(3) = 1
- TimeScale(4) = 0.5
- TimeScale(5) = 0.2
- TimeScale(6) = 0.1
- TimeScale(7) = 0.05
- TimeScale(8) = 0.02
- TimeScale(9) = 0.01
- SignalScale(0) = 10
- SignalScale(1) = 5
- SignalScale(2) = 2
- SignalScale(3) = 1
- SignalScale(4) = .5
- SignalScale(5) = .2
- SignalScale(6) = .1
- SignalScale(7) = .05
- SignalScale(8) = .02
- SignalScale(9) = .01
- For i = 0 To 9
- spnTimeScale.Add(TimeScale(i))
- spnScale0.Add(SignalScale(i))
- spnScale1.Add(SignalScale(i))
- spnScale2.Add(SignalScale(i))
- spnScale3.Add(SignalScale(i))
- Next
- spnTimeScale.SelectedIndex = 6
- spnScale0.SelectedIndex = 3
- spnScale1.SelectedIndex = 3
- spnScale2.SelectedIndex = 3
- spnScale3.SelectedIndex = 3
- Curve(0).Scale = Div / spnScale0.SelectedItem
- Curve(1).Scale = Div / spnScale1.SelectedItem
- Curve(2).Scale = Div / spnScale2.SelectedItem
- Curve(3).Scale = Div / spnScale3.SelectedItem
- End Sub
- Sub InitCalcCurves
- w(0) = 2 * cPI * 2.1
- w(1) = 2 * cPI * 3.7
- w(2) = 2 * cPI * 4.3
- w(3) = 2 * cPI * 5.7
- a(0) = 1.0
- a(1) = 2.0
- a(2) = -1.0
- a(3) = 1.5
- End Sub
- Sub GetValues
- Dim i As Int
- For i = 0 To CurvesNb
- CurveVal(i, ii) = a(i) * Sin(w(i) * t)
- Next
- End Sub
- Sub DispValues(x As Int)
- Dim i As Int
- i = 100 / GridW * x
- lblValue0.Text = NumberFormat(CurveVal(0, i), 1, 6)
- lblValue1.Text = NumberFormat(CurveVal(1, i), 1, 6)
- lblValue2.Text = NumberFormat(CurveVal(2, i), 1, 6)
- lblValue3.Text = NumberFormat(CurveVal(3, i), 1, 6)
- End Sub
- Sub Timer1_Tick
- Dim i, j As Int
- t = t + dt
- xx = xx + dx
- ii = ii + 1
- If ii > 100 Then
- If SingleShot = True Then
- Timer1.Enabled = False
- SingleShot = False
- Stopped = True
- Return
- Else
- Select ScopeMode
- Case "MEM"
- xx = 0
- ii = 0
- GetValues
- DrawCurves
- Case "SCOPE"
- EraseCurves
- xx = 0
- ii = 0
- GetValues
- DrawCurves
- Case "ROLL"
- ii = 100
- xx = 100 * dx
- For i = 0 To 3
- For j = 0 To 99
- CurveVal(i, j) = CurveVal(i, j + 1)
- Next
- Next
- ScopeRolling = True
- GetValues
- DrawCurves
- End Select
- Return
- End If
- End If
- GetValues
- DrawCurves
- End Sub

