File Uploading with Progress Bar using PHP and JavaScript Tutorial
In this tutorial, I will demonstrate how to create a straightforward web application featuring a File Uploads with a Progress Bar. Throughout this article, I'll provide code snippets along with brief explanations to facilitate your understanding of the file upload process. The tutorial is created to serve as a valuable resource for students and beginners in PHP and JS programming languages, enabling them to enhance their knowledge and web application development skills.
Understanding the File Upload Feature
File uploading is a common functionality for transferring files across networks, particularly over the internet. This feature is often integrated into applications, allowing users to upload files to the server for convenient access from anywhere. Prominent examples of web and mobile applications employing this feature include Google Drive and Dropbox. These applications primarily serve the purpose of Storing and Sharing Documents or Files Online.
In certain instances, file uploading is incorporated to support other aspects of applications, such as Social Media Applications, which often includes User Profile Images and Sharing of Videos and Images.
Let's Get Started
By the end of this tutorial, we will have created the following files for the intended basic web application.
    - upload // directory of uploaded files
    - index.php
    - upload.php
    - styles.css
    - script.js
Creating the Index File
To start with, we will create the primary page of the application. This page includes the HTML structure responsible for loading stylesheets, scripts, and the file upload form. It also incorporates the progress bar elements. Kindly save the provided code snippet as index.php.
- <!DOCTYPE html>
- <html lang="en">
- <head>
- <meta charset="UTF-8">
- <meta name="viewport" content="width=device-width, initial-scale=1.0">
- <link rel="stylesheet" href="https://cdn.jsdelivr.net/npm/[email protected]/dist/css/bootstrap.min.css">
- <link rel="stylesheet" href="styles.css">
- <script src="https://cdn.jsdelivr.net/npm/[email protected]/dist/js/bootstrap.bundle.min.js"></script>
- </head>
- <body>
- <main>
- <div class="card border-top border-3 border-primary shadow rounded-0 mx-auto">
- <div class="card-body rounded-0">
- <div class="container-fluid">
- <!-- Upload Form -->
- <form action="" id="uploadForm">
- <div class="mb-3">
- <input class="form-control form-control-sm" id="file" name="file" type="file" required>
- </div>
- <div class="mb-3">
- <!-- Progress Bar -->
- <div id="uploadProgressBar">
- </div>
- <!-- /Progress Bar -->
- </div>
- <div class="d-flex w-100 justify-content-center">
- </div>
- </form>
- <!-- /Upload Form -->
- </div>
- </div>
- </div>
- </main>
- </body>
- </html>
Creating the Stylesheet File
Now, it's time to create the Cascading Stylesheet (CSS) file responsible for defining the layout and design of various elements. This file will be named styles.css and will be linked within the index.php file.
- html, body{
- width: 100%;
- height: 100%;
- }
- body{
- background-color: #0093E9;
- background-image: linear-gradient(160deg, #0093E9 0%, #80D0C7 100%);
- display: flex;
- justify-content: center;
- align-items: center;
- }
- main{
- width: 600px;
- }
- @media (max-width: 601px){
- main{
- width: 100%;
- }
- }
- /*
- Progress Bar
- */
- #uploadProgressBar{
- display: none;
- }
- #uploadProgressBar .bar{
- position: relative;
- width: 100%;
- border: 1px solid #afafaf;
- border-radius: 3px;
- height: 20px;
- box-shadow: 3px 3px 5px #0000004d;
- --progress-width: 0%;
- overflow: hidden;
- margin-bottom: 5px;
- }
- #uploadProgressBar .bar::before{
- content: "";
- position: absolute;
- height: 100%;
- width: var(--progress-width);
- background: #0093E9;
- transition: all .3s ease-in-out;
- }
- #uploadProgressBar .bar::after{
- content: "";
- position: absolute;
- height: 100%;
- width: 100%;
- background: linear-gradient(to right, transparent 30%, #ffffff3d 80%, #ffffff1a 100%);
- animation: slide 3s ease-in-out infinite;
- }
- @keyframes slide {
- 0%{
- transform: translateX(-100%);
- }
- 100%{
- transform: translateX(100%);
- }
- }
- #uploadProgressBar .progress-percentage{
- font-size: 1.3rem;
- font-weight: 700;
- letter-spacing: .5px;
- color: #4d4d4d;
- }
Creating the Script File
Next, we will create the JavaScript file responsible for managing form submissions and sending requests for file uploads. Additionally, this file includes scripts for monitoring the upload progress and updating the progress bar data. It will be named script.js and will be included in the index.php for execution.
- // Form
- const form = document.querySelector('#uploadForm')
- // Progress Bar
- const progressBar = document.getElementById('uploadProgressBar')
- // Event Listner for Uploading the File
- form.addEventListener('submit', uploadFile)
- function uploadFile(e){
- e.preventDefault()
- // Remove previous upload message
- if(!!form.querySelector('.upload-msg')){
- form.querySelector('.upload-msg').remove()
- }
- // Display Progress Bar
- progressBar.style.setProperty('display', 'block')
- // Disable form's File Input and Button
- form.querySelector('#file').setAttribute('disabled', true)
- form.querySelector('button').setAttribute('disabled', true)
- // Start Upload Ajax
- const reqst = new XMLHttpRequest();
- // Event Listener for monitoring the progress
- reqst.upload.addEventListener("progress", uploadProgress);
- // Event Listener when Ajax is completed
- reqst.addEventListener("load", function(e){
- progressBar.after(document.createRange().createContextualFragment(reqst.response))
- form.reset();
- form.querySelector('#file').removeAttribute('disabled')
- form.querySelector('button').removeAttribute('disabled')
- });
- // Event Listener when Ajax throws an error
- reqst.addEventListener("error", function(){
- alert("Uploading file failed due to unknown reason.")
- });
- // Opeing the request
- reqst.open("POST", 'upload.php', true);
- // Creating the formdata
- var formData = new FormData(this);
- formData.append('file', form.querySelector('#file').files[0])
- // Sending the request's data
- reqst.send(formData);
- }
- function uploadProgress(e){
- // bytes equevalent to 1 MB in binary
- var bytes = 1048576
- // Getting the current loaded data in MB
- var loaded = (parseFloat(e.loaded) / bytes);
- // Getting the Total data in MB
- var total = (parseFloat(e.total) / bytes);
- // Getting the percentage of the loaded data over the total data
- var percentage = ((loaded / total) * 100).toLocaleString('en-US',{'style':'decimal', maximumFractionDigits:2})
- // Update Progress Bar
- progressBar.querySelector('.bar').style.setProperty('--progress-width',percentage + '%');
- progressBar.querySelector('.progress-percentage').innerText = percentage + '%';
- }
Creating the File Uploading Script
Lastly, we will create the PHP file that houses the scripts and code responsible for managing the file upload process. This file also includes a script for checking and renaming the uploaded filename if it already exists. It will be named upload.php.
- <?php
- $filename = $_FILES['file']['name'];
- //Check if directory exists
- /**
- * Checking if the filename already exists
- */
- $i = 1;
- while(true){
- $i++;
- }else{
- break;
- }
- }
- // Destination of the uploaded file
- $destination = "./upload/".$filename;
- // Uploading the file
- if($upload){
- // IF file upload is successfull
- echo "<div class='alert alert-success rounded-0 upload-msg'>
- File has been uploaded successfully!
- <br>
- <a href='{$destination}' target='_blank'>{$filename}</a>
- </div>";
- }else{
- // If the file upload fails
- echo "<div class='alert alert-danger rounded-0 upload-msg'>Uploading file failed</div>";
- }
- }
- ?>
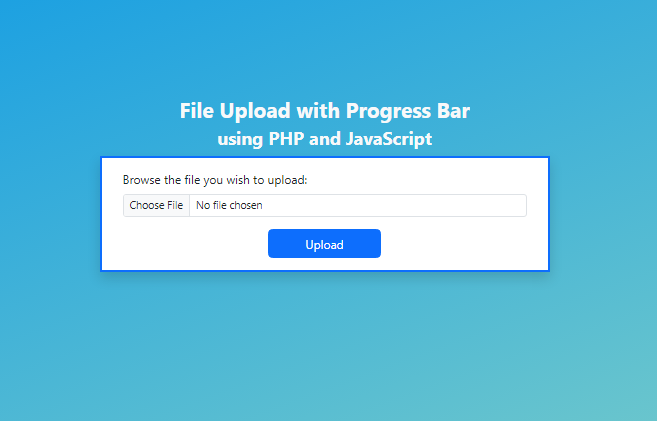
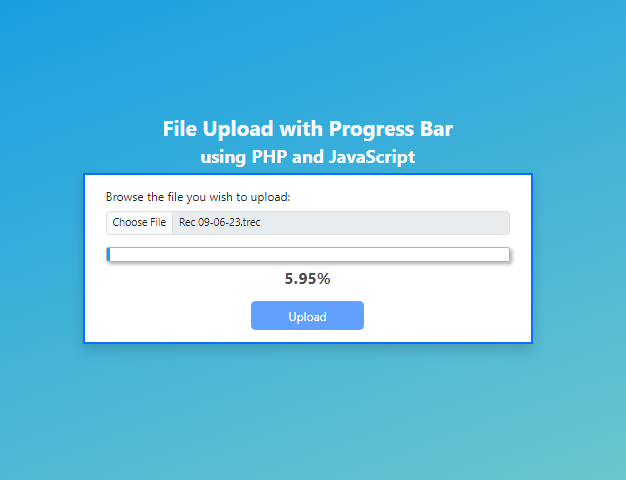
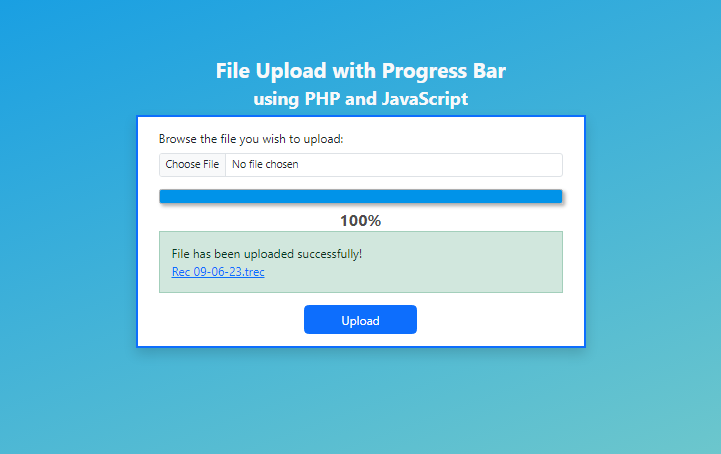
Below, you'll find images demonstrating the execution of the provided code snippets on my end.
File Upload Form
Display during File Upload Progress
Display after Successful File Upload
DEMO VIDEO
Additionally, I've made the complete compressed source code files available on this website. Feel free to download, modify, or enhance them according to your specific needs or requirements. You'll find the download button located below this article.
And that's it! I hope this PHP and JavaScript Tutorial on File Uploads with Progress Bars contributes to your programming skills and provides you with valuable scripts for your current or future projects.
Explore further on this website for more Free Source Code, Tutorials, and Articles.
Happy Coding =)
Add new comment
- 1832 views


