Animation: Bouncing Ball in Visual Basic 2008
Submitted by janobe on Tuesday, April 29, 2014 - 13:16.
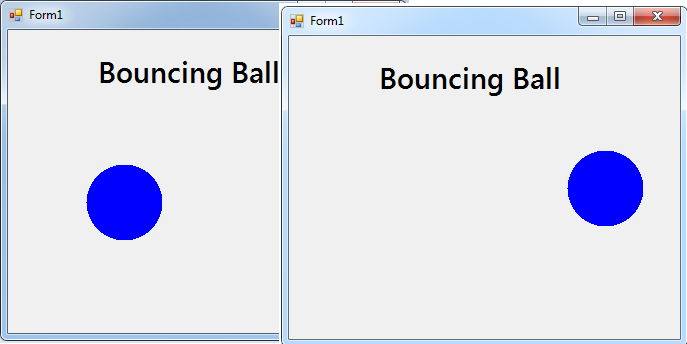
In this tutorial I’m going to teach you how to animate a ball by using Visual basic 2008. The feature of the ball is that, it bounces in every side of the Form. With this, you will learn the functions of the bitmap and the graphics object.
Let’s begin:
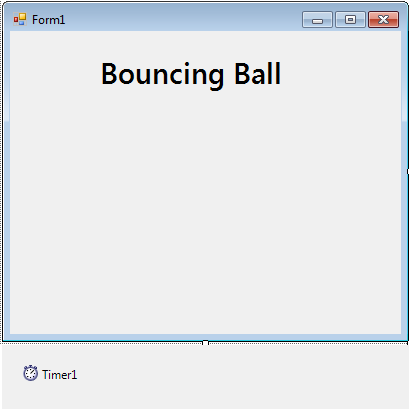
Open the Visual Basic 2008 and create a New Windows Application. Add the timer and the Label which is the title of the Form.
 Double click the Timer and do the following code above the
In the
Create a control class that overrides the OnResize method. OnResize increases the Resize event and it occurs when the control is resized.
After that, go back to the Design Views ,double click the Form and do the following code for starting the timer.
You can the download the complete source code on your computer.
Double click the Timer and do the following code above the
In the
Create a control class that overrides the OnResize method. OnResize increases the Resize event and it occurs when the control is resized.
After that, go back to the Design Views ,double click the Form and do the following code for starting the timer.
You can the download the complete source code on your computer.
Double click the Timer and do the following code above the Timer_Tick sub procedure for declaring all the variables that are needed.
- Private b_Size As Integer = 8 'FRACTION OF BALL SIZE
- Private move_Size As Integer = 4 'FRACTION OF CLIENT AREA
- Private btmp As Bitmap
- Private b_PositionX As Integer
- Private b_PositionY As Integer
- Private b_RadiusX As Integer
- Private b_RadiusY As Integer
- Private b_MoveX As Integer
- Private b_MoveY As Integer
- Private b_BitmapWidth As Integer
- Private b_BitmapHeight As Integer
- Private bitmap_WidthMargin As Integer
- Private bitmap_HeightMargin As Integer
Timer_Tick Sub Procedure, do the following code for the movement of the ball.
- Private Sub Timer1_Tick(ByVal sender As System.Object, ByVal e As System.EventArgs) Handles Timer1.Tick
- 'DECLARE A VARIABLE TO OBTAIN THE GRAPHICS OBJECT.
- Dim grafx As Graphics = CreateGraphics()
- 'DRAW THE BALL IN THE FORM.
- grafx.DrawImage(btmp, _
- CInt(b_PositionX - b_BitmapWidth / 2), _
- CInt(b_PositionY - b_BitmapHeight / 2), _
- b_BitmapWidth, b_BitmapHeight)
- grafx.Dispose()
- 'INCREAMENT THE POSITION OF THE BALL BY ITS DISTANCE TO MOVED BOTH X AND Y AXIS.
- b_PositionX += b_MoveX
- b_PositionY += b_MoveY
- 'REVERSE THE DIRECTION OF THE BALL WHEN IT HITS TO THE BOUNDARY.
- If b_PositionX + b_RadiusX >= ClientSize.Width _
- Or b_PositionX - b_RadiusX <= 0 Then
- b_MoveX = -b_MoveX
- Beep()
- End If
- 'SET THE Y BOUNDARY TO 90 SO THAT IT WILL NOT EXCEED TO THE TITLE OF THE FORM.
- If b_PositionY + b_RadiusY >= ClientSize.Height _
- Or b_PositionY - b_RadiusY <= 90 Then
- b_MoveY = -b_MoveY
- Beep()
- End If
- End Sub
- Protected Overrides Sub OnResize(ByVal ev_arg As EventArgs)
- Dim grafx As Graphics = CreateGraphics()
- 'ERASE ANY DRAWINGS.
- grafx.Clear(BackColor)
- 'DECLARE A VARIBLE THAT HOLDS THE RADIUS OF THE BALL
- 'THEN SET THE WIDTH OR THE HIEGHT OF IT TO A FRACTION WHICHEVER IS LESS TO THE CLIENT AREA.
- Dim dbl_Radius As Double = Math.Min(ClientSize.Width / grafx.DpiX, _
- ClientSize.Height / grafx.DpiY) / b_Size
- 'SET THE HIEGHT AND WIDTH OF THE BALL.
- b_RadiusX = CInt(dbl_Radius * grafx.DpiX)
- b_RadiusY = CInt(dbl_Radius * grafx.DpiY)
- grafx.Dispose()
- 'SET THE DISTANCE THAT THE BALL MOVES INTO 1 PIXEL OR THE BALL SIZE WHICHEVER IS GREATER.
- 'THIS MEANS THAT THE DISTANCE OF THE BALL MOVES EACH TIME IS PROPORTIONAL TO ITS SIZE,
- 'WHICH IS ALSO PROPORTIONAL TO THE SIZE OF THE CLIENT AREA.
- 'THE BALL SLOWS DOWN WHENEVER THE CLIENT AREA IS SHRUNK
- 'AND THE BALL SPEEDS UP WHEN IT IS INCREASED.
- b_MoveX = CInt(Math.Max(1, b_RadiusX / move_Size))
- b_MoveY = CInt(Math.Max(1, b_RadiusY / move_Size))
- 'THE VALUE OF THE BALL'S MOVEMENT SERVES AS THE MARGIN AROUND THE BALL,
- 'THAT DETERMINES THE ACTUAL SIZE OF BITMAP ON WHICH THE BALL IS DRAWN.
- 'THE DISTANCE OF THE BALL MOVES IS EQUAL TO THE SIZE OF THE BITMAP,
- 'WHICH ALLOWS THE PREVIOUS BALL'S IMAGE TO BE ERASED BEFORE THE NEXT IMAGE IS DRAWN.
- bitmap_WidthMargin = b_MoveX
- bitmap_HeightMargin = b_MoveY
- 'TO FIND OUT THE ACTUAL SIZE OF THE BITMAP ON WHICH THE BALL IS DRAWN
- 'PLUS THE MARGINS TO THE BALL'S DIMENSIONS.
- b_BitmapWidth = 2 * (b_RadiusX + bitmap_WidthMargin)
- b_BitmapHeight = 2 * (b_RadiusY + bitmap_HeightMargin)
- 'CREATE A NEW WIDTH AND HEIGHT OF THE BITMAP.
- btmp = New Bitmap(b_BitmapWidth, b_BitmapHeight)
- 'OBTAIN THE GRAFPHICS OBJECT SHOWN BY THE BITMAP.
- grafx = Graphics.FromImage(btmp)
- 'CLEAR THE EXISTING BALL AND DRAW A NEW BALL.
- With grafx
- .Clear(BackColor)
- .FillEllipse(Brushes.Blue, New Rectangle(b_MoveX, _
- b_MoveY, 2 * b_RadiusX, 2 * b_RadiusY))
- .Dispose()
- End With
- 'RESET THE POSITION OF THE BALL TO THE CENTER OF THE CLIENT AREA.
- b_PositionX = CInt(ClientSize.Width / 2)
- b_PositionY = CInt(ClientSize.Height / 2)
- End Sub
- Private Sub Form1_Load(ByVal sender As System.Object, ByVal e As System.EventArgs) Handles MyBase.Load
- Timer1.Start()
- End Sub
Add new comment
- 638 views