Date Calculator in Visual Basic 2008
Submitted by janobe on Friday, April 25, 2014 - 10:14.
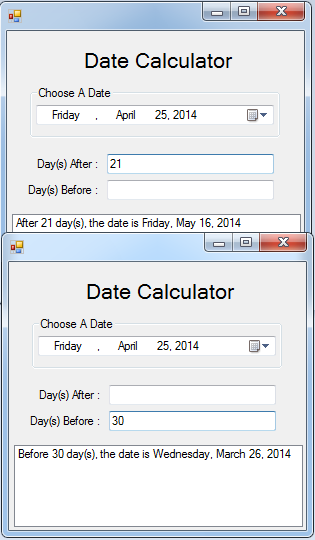
Today I’m going to show you how to create a simple Date Calculator in Visual Basic 2008.With this, it will help you know the dates before and after the present date. For instance, you want to jump into seven days after the present date, the date calculator will automatically calculate it. And you don’t have to count the days anymore.
So lets begin:
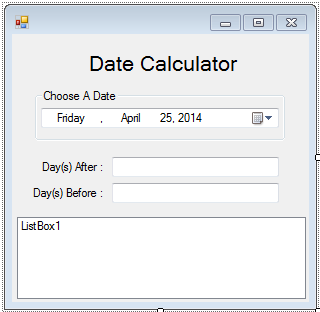
Open Visual Basic 2008, create a new Windows Application and do the Form just like this. Name the two textboxes, the first is “txtafter” and the other one is “txtbefore” and the DateTimePicker is “dtpstrdate”.
 Double click the Form and do the following code above the
Then, go back the Design Views, double click the Textbox(txtafter) and do the following code.
After that, go back to the Design Views again, double click the Textbox(txtbefore) and do the following code.
You can download the complete source.
Double click the Form and do the following code above the
Then, go back the Design Views, double click the Textbox(txtafter) and do the following code.
After that, go back to the Design Views again, double click the Textbox(txtbefore) and do the following code.
You can download the complete source.
Double click the Form and do the following code above the Form_Load for declaring the variables.
- 'DECLARING THE VARIABLES
- Dim intervaldate As Integer 'REPRESENTS A DATE INTERVAL
- Dim dateresult As Date 'REPRESENTS THE ADDED DATE OF START DATE AND THE INTERVAL DAYS
- Dim msg As String 'REPESENTS A MESSAGE TO PUT INTO A LISTBOX
- Private Sub txtafter_TextChanged(ByVal sender As System.Object, ByVal e As System.EventArgs) Handles txtafter.TextChanged
- Try
- 'CONDITIONING THE AFTER DAYS INTERVAL
- If txtafter.Text.Length > 0 Then 'CHECK THE INTERVAL DAYS IF GREATER THAN 0.
- intervaldate = CInt(txtafter.Text) 'ASSIGNING A TEXTBOX TO A VARIALBLE
- 'FORMULA
- dateresult = dtpstrdate.Value.AddDays(intervaldate).ToString() 'ADDING THE INTERVAL DAYS TO THE START DATE.
- msg = "After " & intervaldate & " day(s), the date is " 'MESSAGE TO BE PUT IN THE LISTBOX
- ListBox1.Items.Clear() 'CLEARING A LISTBOX
- ListBox1.Items.Add(msg & Format(dateresult, "dddd, MMMM dd, yyyy")) 'ADDING A MESSAGE AND FORMATTED DATE RESULT IN THE LISTBOX
- txtbefore.Clear() 'CLEARING THE TEXTBOX
- Else
- ListBox1.Items.Clear() 'CLEARING A LISTBOX
- End If
- Catch ex As Exception
- End Try
- End Sub
- Private Sub txtbefore_TextChanged(ByVal sender As System.Object, ByVal e As System.EventArgs) Handles txtbefore.TextChanged
- Try
- 'CONDITIONING THE BEFORE DAYS INTERVAL
- If txtbefore.Text.Length > 0 Then
- intervaldate = CInt(txtbefore.Text)
- 'FORMULA
- 'SYNTAX...
- 'THE FORMULA IS THE SAME BUT THE TWIST IS
- 'I ADD A NEGATIVE INTERVAL SO THAT IT WILL GO BACK TO THE PREVIOUS DATE.
- dateresult = dtpstrdate.Value.AddDays(-intervaldate).ToString()
- msg = "Before " & intervaldate & " day(s), the date is "
- ListBox1.Items.Clear()
- txtafter.Clear()
- Else
- ListBox1.Items.Clear()
- End If
- Catch ex As Exception
- End Try
- End Sub
Add new comment
- 210 views