Introduction to javax.swing Library. A Simple Notepad Application. Part 1
Submitted by pavel7_7_7 on Wednesday, February 5, 2014 - 09:39.

In this article I'll describe how to create a simple Notepad application using javax.swing library.
Now, you know how to create java projects in Eclipse. So, we will create a new project, called coolReader. First of all, I'll show you the structure of the project:
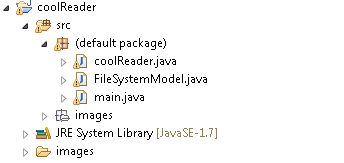 So, the project consists of 3 classes and a set of images, used to create some buttons.
Now,we wil speak about coolReader class. This class is the class, that has the full implementation of the GUI and event handling. Let's look on the class definition:
coolReader class extends JFrame class and implements a list of interfaces - ActionListener for handling events from buttons,MouseListener to handle mouse event and ListSelectionListener for events, generated by selection lists.
The next step of work it's to define elements, that we will use in GUI.
You can define all the components as fields in this way:
Don't be afraid of huge number of fields. All of them have descriptive names and we will about them during the construction of the editor's frame.
Now, all the fields must be initialized and added to the frame. We will do it in the constructor of the coolReader class.
The first step, it's to initialize the main component of text editor - text area:
The next lines of code create a File System Panel in the left part of the frame. We will speak about it latter, because it's not related to the GUI and swing library.
Now we need to handle resize event of the frame. For this, a component adapter is used:
After this, we can finish the building of the frame. As you can see, editor consists of 3 parts : Menu, File System Explorer and Text area.
Now we will add File System Explorer and text Area using Border Layout:
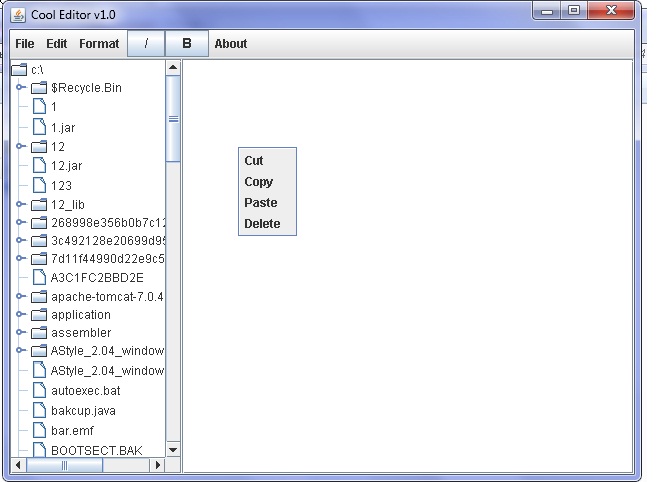
Every editor has a popup menu, that you can see, when you right-click text area. We will create the same thing with this code:
The popup menu will look like this:
So, the project consists of 3 classes and a set of images, used to create some buttons.
Now,we wil speak about coolReader class. This class is the class, that has the full implementation of the GUI and event handling. Let's look on the class definition:
coolReader class extends JFrame class and implements a list of interfaces - ActionListener for handling events from buttons,MouseListener to handle mouse event and ListSelectionListener for events, generated by selection lists.
The next step of work it's to define elements, that we will use in GUI.
You can define all the components as fields in this way:
Don't be afraid of huge number of fields. All of them have descriptive names and we will about them during the construction of the editor's frame.
Now, all the fields must be initialized and added to the frame. We will do it in the constructor of the coolReader class.
The first step, it's to initialize the main component of text editor - text area:
The next lines of code create a File System Panel in the left part of the frame. We will speak about it latter, because it's not related to the GUI and swing library.
Now we need to handle resize event of the frame. For this, a component adapter is used:
After this, we can finish the building of the frame. As you can see, editor consists of 3 parts : Menu, File System Explorer and Text area.
Now we will add File System Explorer and text Area using Border Layout:
Every editor has a popup menu, that you can see, when you right-click text area. We will create the same thing with this code:
The popup menu will look like this:
 Let's create a simple menu in the top of frame:
I used some set of images for this menu, so now we will load all the images to use them in the process of menu's building:
The process of creating menu is very simple. I'll describe only menu "File" and the other menus are created in the similar way. The common steps are :
The last step to create GUI is to set title to the frame and the default operation on close. It can be done in the following way:
To test the frame lets create the main class.
Let's create a simple menu in the top of frame:
I used some set of images for this menu, so now we will load all the images to use them in the process of menu's building:
The process of creating menu is very simple. I'll describe only menu "File" and the other menus are created in the similar way. The common steps are :
The last step to create GUI is to set title to the frame and the default operation on close. It can be done in the following way:
To test the frame lets create the main class.
 It's only the frame, but no any functionality is realized. We will speak about the realization of all functions in the next article.
So, the project consists of 3 classes and a set of images, used to create some buttons.
Now,we wil speak about coolReader class. This class is the class, that has the full implementation of the GUI and event handling. Let's look on the class definition:
- public class coolReader extends JFrame implements ActionListener,MouseListener,ListSelectionListener
- private JMenu textMenu,
- editMenu,
- formatMenu,
- aboutMenu,
- fontSubMenu,
- sizeSubMenu;
- private JMenuItem open,
- save,
- save_as,
- exit,
- cut,
- copy,
- paste,
- delete,
- find,
- replace,
- help,
- about;
- private JMenuItem mCut,
- mCopy,
- mPaste,
- mDelete;
- private JList<String> fontSizeList,
- fontList;
- private JToggleButton italicBtn,
- boldBtn;
- private JScrollPane textPanel,
- catalogPanel;
- private int fontStyle;
- private int currentFontSize;
- ////------------------------------
- private FileSystemModel fileSystemModel;
- //---------------------------------
- textArea.setBounds(0,50,860,640);//set size of text area
- textArea.setAutoscrolls(true);//it possible to scroll text area
- textArea.addMouseListener(this);//adding mouseListener to handle events
- catalog.setAutoscrolls(true);//set Jtree autoscroll
- //add event listener using anonymous class
- //open's a file only if it's extension is .txt
- if(file.getAbsolutePath().substring(file.getAbsolutePath().length()-3).equals("txt")){
- openFile(file,file.getAbsolutePath());
- }
- }
- });
- catalog.setSize(e.getComponent().getSize().width/5, e.getComponent().getSize().height);
- repaint();
- }
- });
- editorFrame = this.getContentPane();
- ditorFrame.add(textPanel);
- //initializing menu items and adding actionListener for every item
- mCut.addActionListener(this);
- mCopy.addActionListener(this);
- mPaste.addActionListener(this);
- mDelete.addActionListener(this);
- //add Items to menu
- mouseMenu.add(mCut);
- mouseMenu.add(mCopy);
- mouseMenu.add(mPaste);
- mouseMenu.add(mDelete);
Let's create a simple menu in the top of frame:
- create JMenu name of menu
- create a JMenuItem with specified icon and description
- add actionListener for menu item
- add MenuItem objects to JMenu object
- add JMenu to JMenuBar
- open.addActionListener(this);
- save.addActionListener(this);
- save_as.addActionListener(this);
- exit.addActionListener(this);
- textMenu.add(open);
- textMenu.addSeparator();
- textMenu.add(save);
- textMenu.add(save_as);
- textMenu.addSeparator();
- textMenu.add(exit);
- readerBar.add(textMenu);
- setJMenuBar(readerBar);
- setTitle("Cool Editor v1.0");
- setDefaultCloseOperation(EXIT_ON_CLOSE);
Here we create a coolReader object, set it's size and make it to be visible.
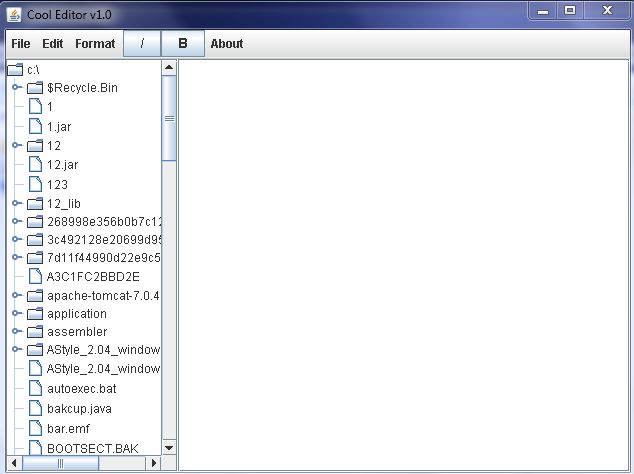
Now, our frame editor looks like this:
It's only the frame, but no any functionality is realized. We will speak about the realization of all functions in the next article.Add new comment
- 67 views