Using PHP cURL with POST Data Tutorial

In this tutorial, we will tackle about how to Use PHP cURL with POST Data. This tutorial aims to give the IT/CS Students or those programmers that are new in PHP Language a reference or guide for using PHP cURL module with POST data. I will be providing a simple program that demonstrates our goal for this tutorial.
What is PHP cURL?
cURL stands for "Client URL's". It is one of the modules of of PHP. This module allows you to send and receive files over HTTP. It also allows you to pass data such as POST and GET Data. This will make various websites and domains connect simply.
Getting Started
First, we will need a virtual servers such as XAMPP/WAMPP to run our PHP Script.
Using XAMPP
Follow the following step before proceeding to the coding part of this tutorial.
- Make sure that cURL Extension is already enabled in your php.ini file.
- Open the XAMPP's Control Panel and start the Apache server.
Using PHP cURL with HTTP POST Data
The following scripts are an example of how to use PHP cURL with POST Data for your site.
Creating a Form
First we will be creating the form where you or users can encode data to submit. The script below is an HTML and PHP script for simple form for this tutorial. In my case, I save this file as index.php. The file also contains the script for sending POST Data and Receiving output from another URL using PHP cURL.
- <!DOCTYPE html>
- <html lang="en">
- <head>
- <meta charset="UTF-8">
- <meta http-equiv="X-UA-Compatible" content="IE=edge">
- <meta name="viewport" content="width=device-width, initial-scale=1.0">
- <link rel="stylesheet" href="https://cdn.jsdelivr.net/npm/[email protected]/dist/css/bootstrap.min.css" integrity="sha384-gH2yIJqKdNHPEq0n4Mqa/HGKIhSkIHeL5AyhkYV8i59U5AR6csBvApHHNl/vI1Bx" crossorigin="anonymous">
- </head>
- <body>
- <?php
- if($_SERVER['REQUEST_METHOD'] == "POST"){
- $ch = curl_init();
- curl_setopt($ch, CURLOPT_URL,"http://localhost/php_curl_post/post_api.php");
- curl_setopt($ch, CURLOPT_POST, 1);
- curl_setopt($ch, CURLOPT_POSTFIELDS, http_build_query($_POST));
- curl_setopt($ch, CURLOPT_RETURNTRANSFER, true);
- // curl_setopt($ch, CURLOPT_HEADER, true);
- // curl_setopt($ch, CURLOPT_NOBODY, true);
- $output = curl_exec($ch);
- $http_code = curl_getinfo($ch, CURLINFO_HTTP_CODE);
- curl_close($ch);
- }
- ?>
- <hr>
- <div class="card rounded-0 mx-auto col-lg-6 col-md-8 col-sm-12">
- <div class="card-header">
- </div>
- <div class="card-body">
- <div class="container-fluid">
- <form action="" method="POST" id="sample-form">
- <div class="mb-3">
- <input type="text" class="form-control" id="name" name="name" required="required">
- </div>
- <div class="mb-3">
- <input type="text" class="form-control" id="contact" name="contact" required="required">
- </div>
- <div class="mb-3">
- </div>
- </form>
- </div>
- </div>
- <div class="card-footer py-1">
- <div class="d-grid justify-content-center">
- </div>
- </div>
- </div>
- <div class="card rounded-0 mx-auto col-lg-6 col-md-8 col-sm-12 mt-3">
- <div class="card-header">
- </div>
- <div class="card-body">
- <?php if(isset($output)): ?>
- <div class="container-fluid">
- <div class="bg-secondary bg-opacity-50 p-2">
- <?= $http_code ?>
- </div>
- <div class="bg-secondary bg-opacity-50 p-2">
- <?= $output ?>
- </div>
- </div>
- <?php else: ?>
- <?php endif; ?>
- </div>
- </div>
- </body>
- </html>
Creating a Sample Remote Site
Let's assume that script below is located on a different site. This script will check if there's a POST Data sent for the current request. Here, for demonstration purposes only, we will just output back the received POST data to the sender. There are a lot of things you can do on this side but this is not the purpose of the tutorial.
post_api.php
- <?php
- if($_SERVER['REQUEST_METHOD'] == "POST"){
- echo "<pre>";
- echo "</pre>";
- }
- ?>
Sample Snapshot of the result of the snippets above.
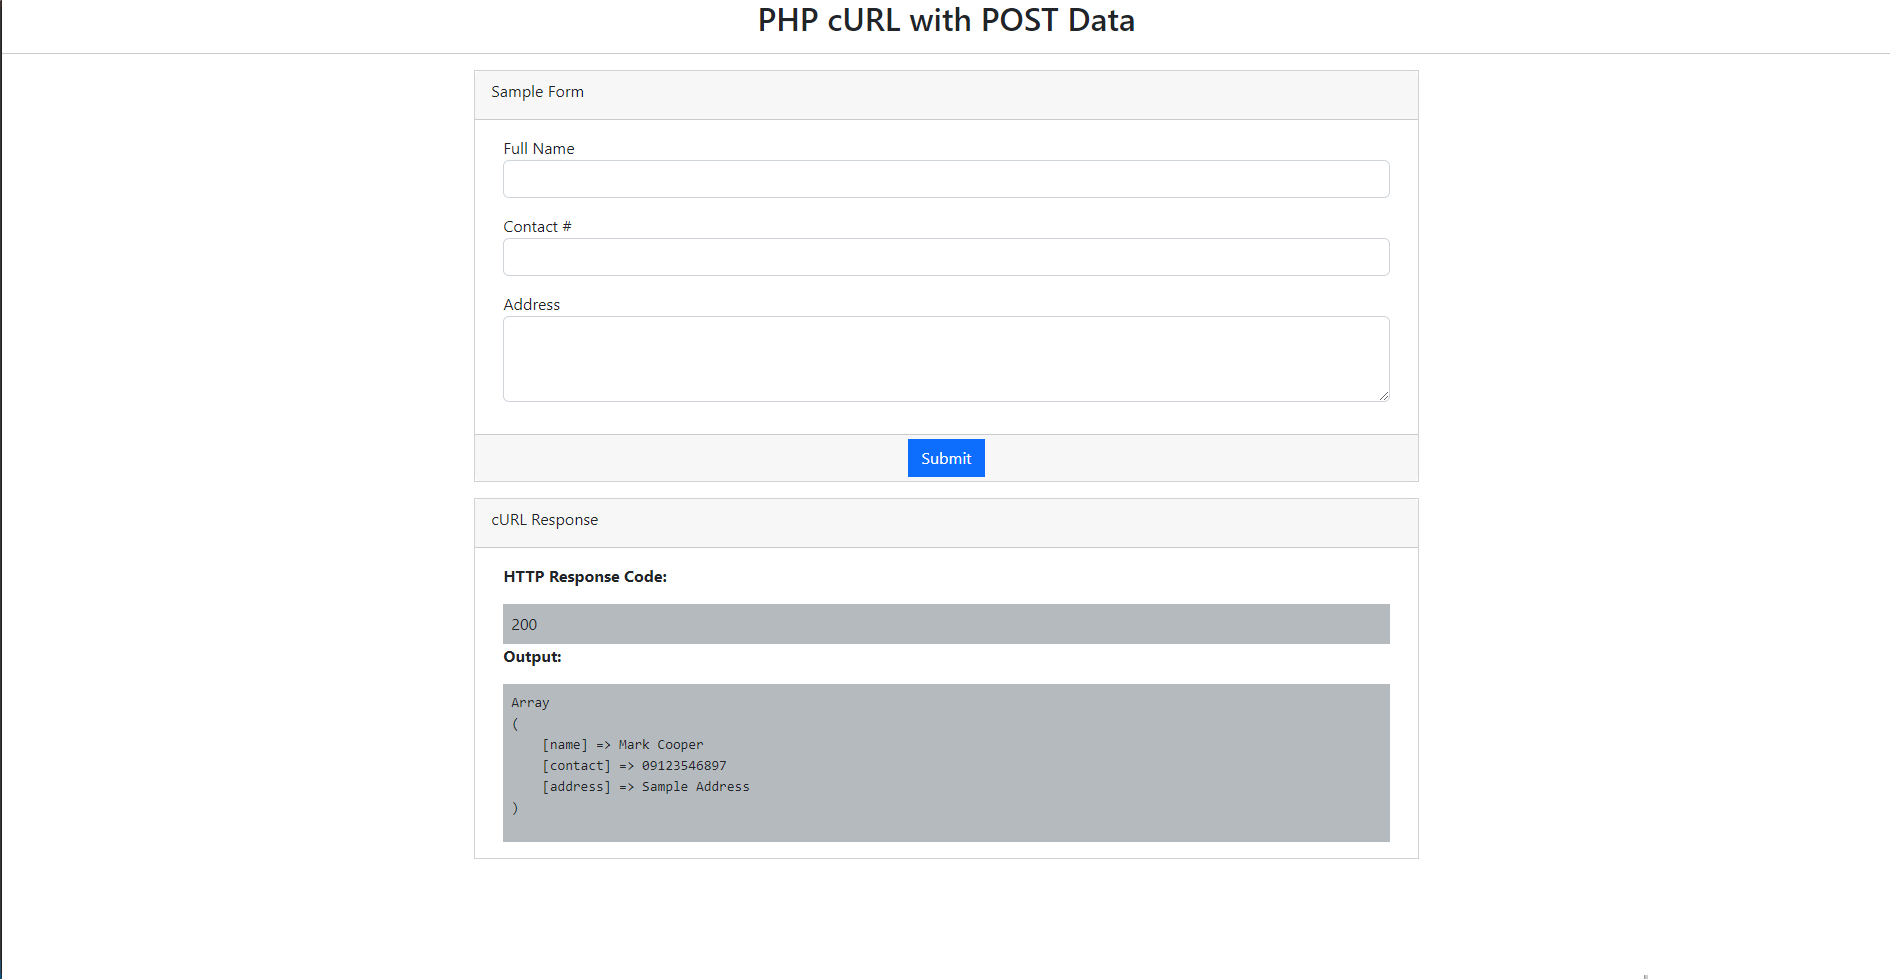
Explaination
As you can see, the following script is written at the index.php file. This is the cURL script that allows the current site to submit or send HTTP POST data to another URL. First, you mus initialize the cURL Module then set some options needed such as the URL and the POST. The CURLOPT_URL option in the script indicates where to send the POST Data. The CURLOPT_POSTFIELDS option indicates for the data we want to send. The CURLOPT_RETURNTRANSFER indicates whether to capture the returned page content of the certaing request.
There you go! You can try the sample PHP cURL Script on your end for submitting or sending HTTP POST Data into another URL. You can also download the provided source code zip file I created for this tutorial that demonstrates the purpose and goal of this tutorial. The download button is located below this article.
I hope this tutorial helps you with what you are looking for and you'll find this useful for your current and future PHP Projects. Explore more on this website for more Tutorials and Free Source Codes.