How to Create a Markdown Previewer Application using HTML, CSS, and JS?
In this detailed step-by-step tutorial, I will guide you through the process of creating a simple yet powerful Markdown Previewer Application using HTML, CSS, and JavaScript. This web application will allow users to write and preview Markdown content in real-time. Throughout the tutorial, we'll integrate popular JavaScript libraries, including Marked for parsing and converting Markdown syntax into HTML and CodeMirror for providing an enhanced code editor experience with syntax highlighting and live preview functionality. By the end of this guide, you’ll have a fully functional Markdown Previewer that you can customize and deploy for your personal or professional projects. Whether you're a beginner looking to enhance your front-end development skills or an experienced developer seeking a quick solution, this tutorial will provide you with a solid foundation for building web applications using HTML, CSS, and JavaScript.
About the Markdown Previewer Application
The Markdown Previewer Application is a straightforward yet highly functional web application that enables end-users to easily input Markdown content into a designated textarea or code editor on the page. As users type, the application instantly converts the Markdown syntax into clean, formatted HTML, which is then displayed in real-time on another section of the page. This seamless and interactive process allows users to see immediate results, making it an invaluable tool for developers, writers, and anyone working with Markdown. The live preview feature ensures that users can quickly check how their content will look when rendered, saving time and enhancing the overall user experience. Whether you're creating documentation, writing blog posts, or preparing content for web pages, this Markdown Previewer simplifies the task of visualizing Markdown content effortlessly.
Additionally, the source code for the Markdown Previewer Application that I will provide in this tutorial makes use of Bootstrap and jQuery libraries to enhance the user interface and functionality. These libraries are seamlessly integrated into the application through CDNs (Content Delivery Networks), ensuring that they load quickly and efficiently without the need for local hosting.
Let's Begin
First, let's create a new stylesheet file for the Markdown Previewer Application. In this tutorial, I have named the file styles.css, and it will be located in the assets/css directory of your project. This stylesheet will handle the design and layout of various elements in the application, ensuring that it has a clean, modern, and user-friendly interface.
- @import url('https://fonts.googleapis.com/css2?family=Revalia&display=swap');
- * {
- box-sizing: border-box;
- }
- html,
- body {
- width: 100%;
- height: 100%;
- max-height: 100%;
- font-family: "Revalia", sans-serif;
- font-weight: 400;
- font-style: normal;
- }
- body {
- background-image: linear-gradient(to top, #09203f 0%, #537895 100%);
- }
- div#main-wrapper {
- display: flex;
- flex-flow: column;
- overflow: auto;
- }
- #page-title {
- width: 100%;
- display: flex;
- justify-content: center;
- padding: 20px 15px;
- color: #fff;
- }
- iframe#md-output {
- background: #eaeaea;
- width: 100%;
- height: 100%;
- }
- .CodeMirror, iframe#md-output
- {
- min-height: 300px;
- }
Next, let’s create the HTML file for the application, which in this case will be named index.html. This file will contain all the necessary HTML elements, including a textarea for the user to input Markdown content, and a separate output container where the converted Markdown will be displayed in real-time as HTML.
- <!DOCTYPE html>
- <html lang="en">
- <head>
- <meta charset="UTF-8">
- <meta name="viewport" content="width=device-width, initial-scale=1.0">
- <!-- Bootstrap CSS CDN -->
- <link href="https://cdn.jsdelivr.net/npm/[email protected]/dist/css/bootstrap.min.css" rel="stylesheet"
- integrity="sha384-QWTKZyjpPEjISv5WaRU9OFeRpok6YctnYmDr5pNlyT2bRjXh0JMhjY6hW+ALEwIH" crossorigin="anonymous">
- <!-- Codemirror CSS -->
- <link rel="stylesheet" href="https://cdnjs.cloudflare.com/ajax/libs/codemirror/5.65.18/codemirror.min.css"
- integrity="sha512-uf06llspW44/LZpHzHT6qBOIVODjWtv4MxCricRxkzvopAlSWnTf6hpZTFxuuZcuNE9CBQhqE0Seu1CoRk84nQ=="
- crossorigin="anonymous" referrerpolicy="no-referrer" />
- <link rel="stylesheet" href="https://cdnjs.cloudflare.com/ajax/libs/codemirror/5.65.18/theme/dracula.min.css"
- integrity="sha512-gFMl3u9d0xt3WR8ZeW05MWm3yZ+ZfgsBVXLSOiFz2xeVrZ8Neg0+V1kkRIo9LikyA/T9HuS91kDfc2XWse0K0A=="
- crossorigin="anonymous" referrerpolicy="no-referrer" />
- <!-- Custom CSS -->
- <link rel="stylesheet" href="asssets/css/styles.css">
- <!-- jQuery -->
- <script src="https://cdnjs.cloudflare.com/ajax/libs/jquery/3.7.1/jquery.min.js" crossorigin="anonymous"
- referrerpolicy="no-referrer"></script>
- <!-- Bootstrap JS CDN's -->
- <script src="https://cdn.jsdelivr.net/npm/@popperjs/[email protected]/dist/umd/popper.min.js"
- integrity="sha384-I7E8VVD/ismYTF4hNIPjVp/Zjvgyol6VFvRkX/vR+Vc4jQkC+hVqc2pM8ODewa9r"
- crossorigin="anonymous"></script>
- <script src="https://cdn.jsdelivr.net/npm/[email protected]/dist/js/bootstrap.min.js"
- integrity="sha384-0pUGZvbkm6XF6gxjEnlmuGrJXVbNuzT9qBBavbLwCsOGabYfZo0T0to5eqruptLy"
- crossorigin="anonymous"></script>
- <!-- Codemirror JS -->
- <script src="https://cdnjs.cloudflare.com/ajax/libs/codemirror/5.65.18/codemirror.min.js"
- integrity="sha512-6cPYokihlrofMNApz7OXVQNObWjLiKGIBBb7+UB+AuMiRCLKmFKgrwms21sHq3bdFFZWpfHYRJBJvMFMPj1S9g=="
- crossorigin="anonymous" referrerpolicy="no-referrer"></script>
- <!-- Markdown Compiler CDN -->
- <script src="https://cdnjs.cloudflare.com/ajax/libs/marked/15.0.3/marked.min.js"
- integrity="sha512-7aRjMGJX+VgTMGWgWLpQxavdTKRc2LwCTAS4LmB7OLwGTpH84ehHQoAY/y1fUfprr2yMFC6toDLHpbGaDth9VQ=="
- crossorigin="anonymous" referrerpolicy="no-referrer"></script>
- <!-- Custom JS -->
- </head>
- <body>
- <div id="main-wrapper" class="container-fluid h-100 py-3">
- <div class="row flex-grow-1">
- <div class="col-lg-6 col-md-6 col-sm-12 col-12 d-flex flex-column">
- <div class="flex-grow-1">
- <div class="h-100">
- </div>
- </div>
- </div>
- <div class="col-lg-6 col-md-6 col-sm-12 col-12 d-flex flex-column">
- <div class="flex-grow-1">
- </div>
- </div>
- </div>
- </div>
- </body>
- </html>
To bring our application to life, we’ll need to write the JavaScript that handles the core functionality of the application, such as converting the Markdown content to HTML and displaying it in real time as the user types.
In this step, we’ll create the JavaScript file script.js, which will reside in the assets/js directory.
- var md_code_editor;
- var md_editor;
- var md_output;
- let default_md = `# About this Markdown\nThis markdown content is intended to be used as demo content for the
- **Markdown Previewer Application** free source code published at
- [sourcecodester.com](https://sourcecodester.com)\n\n## Sample\nLorem ipsum dolor sit amet, consectetur adipiscing
- elit. In gravida lectus vitae cursus fringilla. In euismod, nisi ac ultricies laoreet, purus erat volutpat nibh, sed
- tincidunt tellus lectus faucibus odio. Aliquam erat mi, efficitur in eros quis, semper elementum arcu.\n\n## Sample
- List\n- Test 1\n- Test 2\n- Test 3\n- Test 4\n- Test 5\n\n\n## Blockquotes\n> Aenean erat felis, ultricies in
- rhoncus ac, efficitur ac lacus.\n>> Nunc malesuada velit iaculis, viverra metus vitae, semper arcu.\n> Aenean nec
- nibh non tortor tristique vulputate vitae vel diam.`;
- function runMarkdown(){
- var md_value = md_editor.val();
- md_value = marked.marked(md_value, {
- breaks: true
- });
- md_output[0].contentDocument.body.innerHTML = md_value;
- }
- $(document).ready(function(){
- md_editor = $('#md-editor')
- md_output = $('#md-output')
- md_editor.text(default_md);
- md_code_editor = CodeMirror.fromTextArea( md_editor[0], {
- value: md_editor.val(),
- mode:"text/markdown",
- theme:"dracula",
- lineNumbers: true,
- matchBrackets: true,
- styleActiveLine: true,
- lineWrapping: true
- } )
- md_code_editor.setSize(null, md_editor.parent().height()+"px")
- runMarkdown();
- md_code_editor.on("change", function(){
- md_code_editor.save();
- runMarkdown();
- })
- $(window).on("resize",function(){
- md_code_editor.setSize(null, "0px")
- md_code_editor.setSize(null, md_editor.parent().height()+"px")
- })
- })
Now that you've set up the HTML, CSS, and JavaScript files for the Markdown Previewer Application, it's time to test everything on your end and see if the application works as expected.
Snapshots
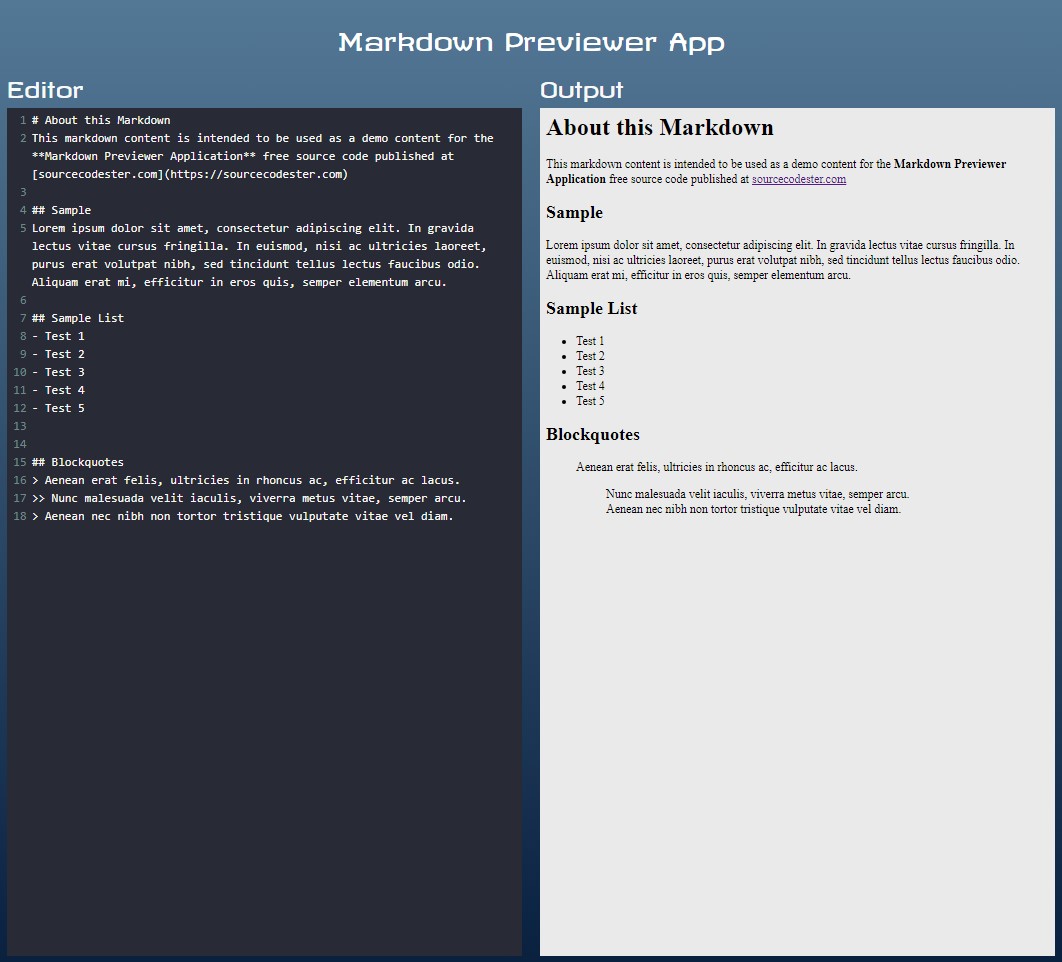
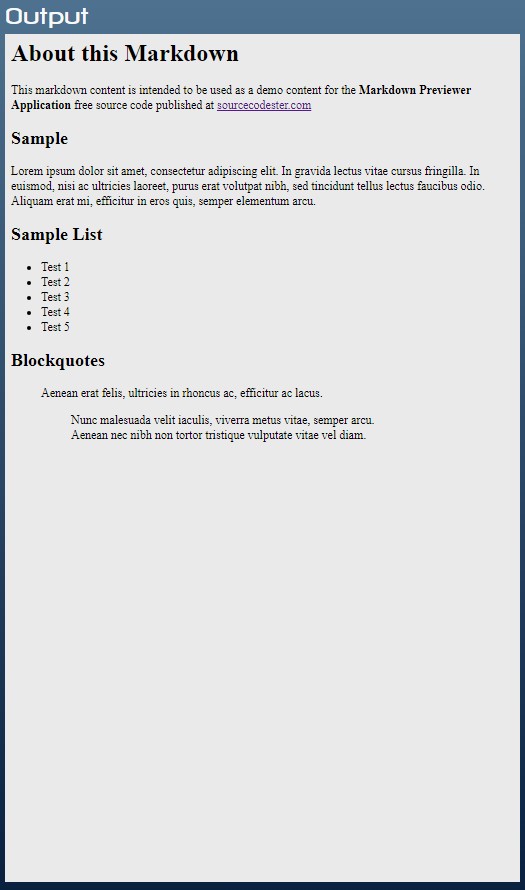
Here are the following screenshots of this Markdown Previewer Application:
Whole Page
Text Editor Section
Output Section
DEMO Video
And there you have it. I hope that this Markdown Previewer Application step-by-step tutorial will help you with what you are looking and you;ll find something useful for your other web applications project in the future. Explore more on this website for more Free Source Code, Tutorials, and Articles that tackles about various programming languages.
Happy Coding :)
Add new comment
- 437 views


