Image Popup/Overlay Viewer with Zoom In and Out using CSS and JavaScript
In this tutorial, you can learn to create an Image Overlay or Popup Viewer using HTML, CSS, and JavaScript. The tutorial aims to provide students and beginners with a reference for learning how to build a useful component of a website or web application using CSS and JS. Here, I have provided a simple program that I created that demonstrates the creation of an Image Overlay or Popup Viewer with zoom and drag features.
What is an Image Overlay or Popup Viewer?
The Image Overlay or Popup Viewer is a website or web application component for displaying or showing the image in a larger size. This component allows the users to view the images shown on the web page in larger sizes and overlays on the web page screen. The image viewer is often implemented with zoom and drag functionality.
How to create an Image Overlay or Popup Viewer?
The Image Overlay or Popup Viewer can be achieved using CSS and JavaScript. sing CSS, we can design the image viewer that overlays on the whole page and display the image on a larger scale. Using the JavaScript event listeners and some methods, APIs, and functionality can help us to display the selected image in the Image viewer. Check out the sample web page script that I have provided below to understand more about how to create the Image Overlay or Popup Viewer.
About the Sample Program
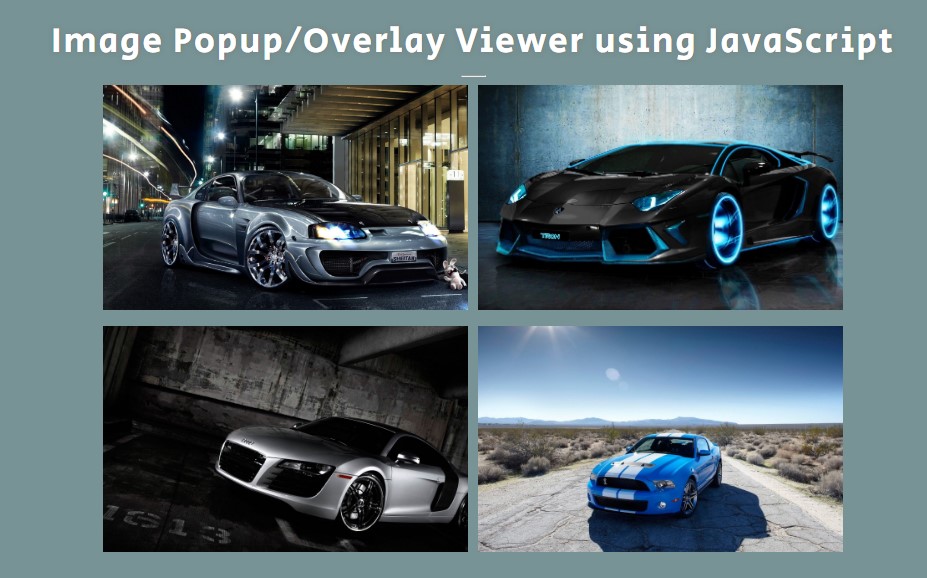
The sample source code provided below results in a simple web page that serves as an Image or Website Gallery page. It contains multiple images that are shown in grid view and smaller scale. Users can view the image on a larger scale. When viewing the image on the overlay viewer, users can also zoom in and out of the image.
Page Interface
Here's the HTML file script of the program that contains the page layout and the sample Image and their container. The file is known as index.html.
- <!DOCTYPE html>
- <html lang="en">
- <head>
- <meta charset="UTF-8">
- <meta http-equiv="X-UA-Compatible" content="IE=edge">
- <meta name="viewport" content="width=device-width, initial-scale=1.0">
- <link rel="preconnect" href="https://fonts.googleapis.com">
- <link rel="preconnect" href="https://fonts.gstatic.com" crossorigin>
- <link rel="stylesheet" href="https://fonts.googleapis.com/css2?family=Material+Symbols+Outlined:opsz,wght,FILL,[email protected],100..700,0..1,-50..200" />
- <link rel="stylesheet" href="style.css">
- </head>
- <body>
- <!-- Image Overlay Wrapper -->
- <div id="image-overlay-wrapper">
- <div class="image-overlay-content">
- <div class="image-overlay-buttons">
- <a href="#" class="image-overlay-close-btn">
- </a>
- <a href="#" class="image-overlay-zoomin-btn">
- </a>
- <a href="#" class="image-overlay-zoomout-btn">
- </a>
- </div>
- </div>
- </div>
- <!-- Image Overlay Wrapper -->
- <div id="wrapper">
- <hr style="width:25px">
- <div id="image-wrapper">
- <div class="image-item">
- <img src="images/image-1.jpg" alt="Sample Image 1">
- </div>
- <div class="image-item">
- <img src="images/image-2.jpg" alt="Sample Image 2">
- </div>
- <div class="image-item">
- <img src="images/image-3.jpg" alt="Sample Image 3">
- </div>
- <div class="image-item">
- <img src="images/image-4.jpg" alt="Sample Image 4">
- </div>
- </div>
- </div>
- </body>
- </html>
Stylesheet
Here's the CSS file script named style.css. The script contains the CSS style codes of the page layout and Image overlay viewer design.
- @import url('https://fonts.googleapis.com/css2?family=Rubik&display=swap');
- @import url('https://fonts.googleapis.com/css2?family=Courgette&family=Secular+One&display=swap" rel="stylesheet');
- :root{
- --secular-font: 'Secular One', sans-serif;
- --satisfy-font: 'Satisfy', cursive;
- }
- *{
- box-sizing: border-box;
- }
- body *{
- font-family: 'Rubik', sans-serif;
- }
- /**
- Page Design
- */
- body,
- html{
- height: 100%;
- width: 100%;
- margin: 0;
- padding: 0;
- }
- body{
- background-color: #789395;
- }
- /* Page Wrapper */
- #wrapper{
- width: 100%;
- min-height: 100%;
- display: flex;
- flex-direction: column;
- align-items: center;
- justify-content: center;
- padding: 3em 0;
- }
- .page-title{
- font-size: 35px;
- font-family: var(--secular-font);
- letter-spacing: 2px;
- text-align: center;
- color:#fff;
- text-shadow: 0px 0px 5px #7070709c;
- }
- /* Image Wrapper */
- #image-wrapper{
- width: 760px;
- margin: auto;
- display: flex;
- flex-wrap: wrap;
- justify-content: space-evenly;
- }
- @media (max-width:760px){
- #image-wrapper{
- width: 100%;
- }
- }
- #image-wrapper .image-item{
- width:48%;
- height:35vh;
- margin-bottom: 1em;
- overflow: hidden;
- cursor: pointer;
- }
- #image-wrapper .image-item>img{
- height: 100%;
- width: 100%;
- object-fit: cover;
- transition: all .3s ease-in-out;
- }
- #image-wrapper .image-item:hover>img{
- transform: scale(1.2);
- }
- /* Image Overlay */
- #image-overlay-wrapper{
- position: fixed;
- width: 100%;
- height: 100%;
- top: 0;
- left: 0;
- flex-direction: column;
- align-items: center;
- justify-content: center;
- overflow: hidden;
- z-index: 99;
- display: hidden;
- opacity: 0;
- animation:fade-out .8s ease-in-out -10s forwards;
- }
- #image-overlay-wrapper .image-overlay-backdrop{
- position: absolute;
- width: 100%;
- height: 100%;
- background-color: #2929299c;
- z-index: 100;
- }
- #image-overlay-wrapper .image-overlay-content{
- width: 80%;
- min-height: 80%;
- max-height: 95%;
- overflow: hidden;
- background-color: #272727;
- border:1px solid #3e3e3e;
- box-shadow: 0px 0px 7px #525252;
- display: flex;
- z-index: 101;
- filter: blur(7px);
- transition: filter .3s ease-in-out 1s;
- }
- #image-overlay-wrapper.show{
- display: flex;
- animation:fade .8s ease-in-out forwards;
- }
- html:has(#image-overlay-wrapper.show){
- overflow: hidden;
- }
- @keyframes fade {
- 0%{
- opacity: 0;
- width: 0%;
- height: 0%;
- }
- 100%{
- opacity: 1;
- width: 100%;
- height: 100%;
- top:0;
- left:0;
- }
- }
- @keyframes fade-out {
- 0%{
- opacity: 1;
- width: 100%;
- height: 100%;
- top:0;
- left:0;
- }
- 100%{
- opacity: 0;
- width: 0%;
- height: 0%;
- }
- }
- @media (max-width:480px) {
- #image-overlay-wrapper .image-overlay-content{
- width: 95%;
- height: 95%;
- }
- }
- #image-overlay-wrapper.show .image-overlay-content{
- filter: blur(0px);
- }
- #image-overlay-wrapper .image-overlay-viewer{
- position: relative;
- width: 95%;
- height: 100%;
- background-color: #000;
- overflow: hidden;
- }
- #image-overlay-wrapper .image-overlay-viewer>img{
- position: relative;
- width: 100%;
- height: 100%;
- object-fit: scale-down;
- object-position: center center;
- transition: transform .3s ease-in-out;
- }
- #image-overlay-wrapper .image-overlay-viewer>img[data-draggable]{
- cursor: grab;
- }
- #image-overlay-wrapper .image-overlay-buttons{
- width: 5%;
- height: 100%;
- display: flex;
- flex-direction: column;
- flex-wrap:wrap ;
- }
- #image-overlay-wrapper .image-overlay-buttons>a{
- width: 100%;
- height: 35px;
- text-decoration: none;
- color:#c9c9c9;
- display: flex;
- align-items: center;
- justify-content: center;
- }
- #image-overlay-wrapper .image-overlay-buttons>a:hover{
- background-color: #f5f5f533;
- }
- #image-overlay-wrapper .image-overlay-buttons>a[disabled]{
- pointer-events: none;
- cursor: not-allowed;
- color:#838383;
- }
Using the script above will result in something like the following image.
Page Layout
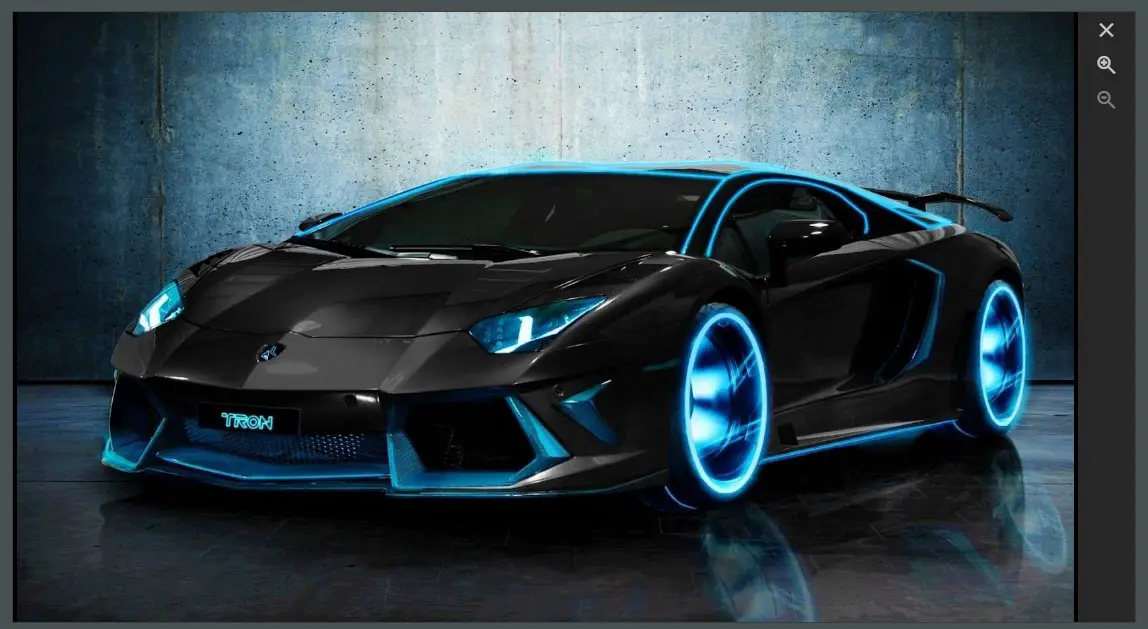
Image Viewer
JavaScript
Then, the JS script provided below contains the codes that make the web page viewing, zooming and dragging the image functional. The file is known as script.js.
- // Image Items Selector
- const imageItems = document.querySelectorAll('.image-item')
- // Image Overlay Wrapper Selector
- const ImageOverlay = document.getElementById('image-overlay-wrapper')
- // Image Overlay Close Button Selector
- const ImageOverlayCloseBtn = ImageOverlay.querySelector('.image-overlay-close-btn')
- // Image Overlay Backdorp Selector
- const ImageOverlayBackdropBtn = ImageOverlay.querySelector('.image-overlay-backdrop')
- // Image Overlay Close Zoomin Selector
- const ImageOverlayZoomInBtn = ImageOverlay.querySelector('.image-overlay-zoomin-btn')
- // Image Overlay Close Zoomout Selector
- const ImageOverlayZoomoutBtn = ImageOverlay.querySelector('.image-overlay-zoomout-btn')
- // maximum zoom in
- const ZoomMax = 5;
- // Current zoom state
- var currentZoom = 1;
- /**
- * Set Image Viewer as Draggable when zoom in
- */
- const makeDraggable = () =>{
- var _image = ImageOverlay.querySelector('.image-overlay-viewer>img')
- if(_image === undefined)
- return false;
- if(currentZoom > 1){
- if(!_image.hasAttribute('data-draggable'))
- _image.setAttribute('data-draggable','')
- }else{
- if(_image.hasAttribute('data-draggable'))
- _image.removeAttribute('data-draggable')
- }
- }
- /**
- * Enable/Disable Zoom Out Button
- */
- const disableEnableZoomOut = (e) =>{
- if(e !== undefined)
- e.preventDefault()
- if(currentZoom <= 1){
- if(!ImageOverlayZoomoutBtn.hasAttribute('disabled'))
- ImageOverlayZoomoutBtn.setAttribute('disabled', "")
- }else{
- if(ImageOverlayZoomoutBtn.hasAttribute('disabled'))
- ImageOverlayZoomoutBtn.removeAttribute('disabled')
- }
- }
- /**
- * Enable/Disable Zoom In Button
- */
- const disableEnableZoomIn = (e) =>{
- if(e !== undefined)
- e.preventDefault()
- if(currentZoom >= ZoomMax){
- if(!ImageOverlayZoomInBtn.hasAttribute('disabled'))
- ImageOverlayZoomInBtn.setAttribute('disabled', "")
- }else{
- if(ImageOverlayZoomInBtn.hasAttribute('disabled'))
- ImageOverlayZoomInBtn.removeAttribute('disabled')
- }
- }
- disableEnableZoomOut()
- disableEnableZoomIn()
- /**
- * Zoom In Image when Zoom In Button is clicked
- */
- ImageOverlayZoomInBtn.addEventListener('click',e=>{
- e.preventDefault()
- var _image = ImageOverlay.querySelector('.image-overlay-viewer>img')
- if(_image === undefined || currentZoom == ZoomMax)
- return false;
- currentZoom++;
- var _newscale = (currentZoom == 0) ? 1 : `${currentZoom}`
- _image.style.transform = `scale(${_newscale})`
- disableEnableZoomOut()
- disableEnableZoomIn()
- makeDraggable()
- })
- /**
- * Zoom Out Image when Zoom Out Button is clicked
- */
- ImageOverlayZoomoutBtn.addEventListener('click',e=>{
- e.preventDefault()
- var _image = ImageOverlay.querySelector('.image-overlay-viewer>img')
- if(_image === undefined || currentZoom <= 1)
- return false;
- currentZoom--;
- var _newscale = (currentZoom == 0) ? 1 : `${currentZoom}`
- _image.style.transform = `scale(${_newscale})`
- disableEnableZoomOut()
- disableEnableZoomIn()
- makeDraggable()
- if(currentZoom == 1)
- _image.style.objectPosition = `center center`
- })
- //remove transition delay
- setTimeout(()=>{
- ImageOverlay.style.animationDelay = '0s'
- },1000)
- /**
- * Show Image Viewer Overlay
- */
- const showImageOverlay = () =>{
- if(!ImageOverlay.classList.contains('show'))
- ImageOverlay.classList.add('show');
- }
- /**
- * Close Image Viewer Overlay
- */
- const closeImageOverlay = (e) =>{
- if(e !== undefined)
- e.preventDefault();
- if(ImageOverlay.classList.contains('show'))
- ImageOverlay.classList.remove('show');
- if(ImageOverlay.querySelector('.image-overlay-viewer>img') !== undefined)
- ImageOverlay.querySelector('.image-overlay-viewer>img').remove()
- currentZoom = 1;
- disableEnableZoomOut()
- disableEnableZoomIn()
- }
- /**
- * Event to allow Image to move
- */
- const imageDraggable = () =>{
- var _image = ImageOverlay.querySelector('.image-overlay-viewer>img')
- var currentXpos = 0,
- currentYpos = 0,
- cursorXstart = _image.x,
- cursorYstart = _image.x,
- _newX,
- _newY;
- function dragging(e){
- var cursorX = e.layerX
- var cursorY = e.layerY
- _newX = currentXpos + (cursorX - cursorXstart)
- _newY = currentYpos + (cursorY - cursorYstart)
- _image.style.objectPosition = `${_newX}px ${_newY}px`
- }
- function startDragging(e){
- if(e !== undefined)
- e.preventDefault();
- if(!_image.hasAttribute('data-draggable'))
- return false;
- cursorXstart = e.layerX
- cursorYstart = e.layerY
- _image.addEventListener('mousemove', dragging)
- _image.addEventListener('mouseup', ()=>{
- _image.removeEventListener('mousemove', dragging)
- currentXpos = _newX;
- currentYpos = _newY;
- })
- }
- _image.addEventListener('mousedown', startDragging)
- }
- /**
- * Show Image when image items are clicked
- */
- imageItems.forEach(item=>{
- item.addEventListener("click", e =>{
- var _left = item.offsetLeft
- var _top = item.offsetTop
- var _width = item.clientWidth
- var _height = item.clientHeight
- var _image = item.querySelector('img')
- if(_image === undefined)
- return false;
- var clonedImage = _image.cloneNode(true)
- ImageOverlay.querySelector('.image-overlay-viewer').appendChild(clonedImage)
- ImageOverlay.style.top = `${_top}px`
- ImageOverlay.style.left = `${_left}px`
- ImageOverlay.style.width = `${_width}px`
- ImageOverlay.style.height = `${_height}px`
- showImageOverlay()
- imageDraggable()
- })
- })
- ImageOverlayCloseBtn.addEventListener('click', closeImageOverlay)
- ImageOverlayBackdropBtn.addEventListener('click', closeImageOverlay)
The script above makes the images on the web page clickable which triggers the image viewer to display and show the selected image on a larger scale. It also contains the script that makes the zooming buttons and image dragging functional.
Here's a snapshot of the image viewer that displays the image using the default scale or size.
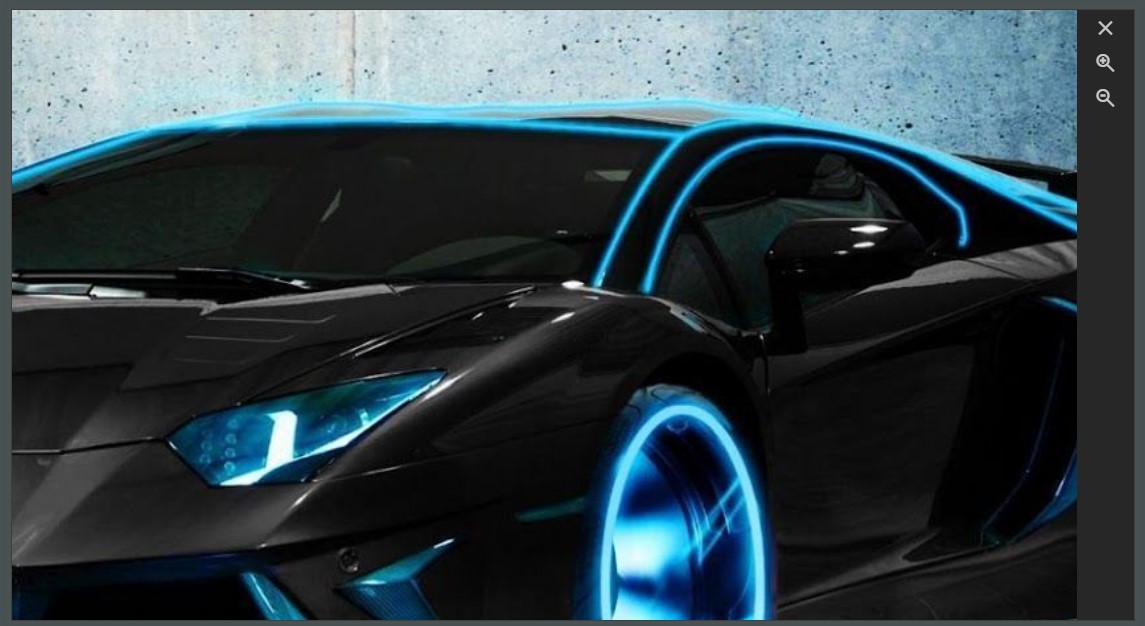
Then, when the below image is an example view of a zoomed-in image.
There you go! I have also provided the complete source code zip file on this website and it is free to download. The download button is located below this tutorial's content. Feel free to download and modify it.
That's it! I hope this Image Popup/Overlay Viewer with Zoom In and Out using CSS and JavaScript will help you with what you are looking for and will be useful for your current and future web application projects.
Explore more on this website for more Tutorials and Free Source Codes.
Happy Coding =)
Add new comment
- 1968 views


