Printing a Specific HTML Element using jQuery Tutorial
In this tutorial, we will tackle about how to create a javascript function that Prints a Specific HTML Element using jQuery. This can help you to lessen your work as a programmer in writing and the lines of your codes. This technique can also prevent code duplication.
The Print function that we will be creating is the cloned data from the HTML. Our goal for this tutorial is to duplicate the HTML Element using jQuery along the elements that contains the codes for styling the element to preserve the design of the element.
Getting Started
Download the jQuery library. For the user interface design, I will be using Bootstrap v5.
Creating the Interface
The script below is the HTML file for our index page of the web application. This contains the elements the element we will print later on. Save this file as index.html.
- <!DOCTYPE html>
- <html lang="en">
- <head>
- <meta charset="UTF-8">
- <meta http-equiv="X-UA-Compatible" content="IE=edge">
- <meta name="viewport" content="width=device-width, initial-scale=1.0">
- <link rel="stylesheet" href="./css/bootstrap.min.css">
- <!-- Custom CSS -->
- <style>
- </style>
- </head>
- <body class="bg-light">
- <nav class="navbar navbar-expand-lg navbar-dark bg-primary bg-gradient" id="topNavBar">
- <div class="container">
- <a class="navbar-brand" href="https://Sourcecodester.com">
- Sourcecodester
- </a>
- </div>
- </nav>
- <div class="container py-3" id="page-container">
- <hr>
- <div id="printables">
- <div class="to_print" id="first_element">
- <hr>
- <table class="table table-bordered table-striped">
- <thead>
- <tr class="bg-primary bg-gradient text-white">
- </tr>
- </thead>
- <tbody>
- <tr>
- </tr>
- <tr>
- </tr>
- <tr>
- </tr>
- <tr>
- </tr>
- <tr>
- </tr>
- </tbody>
- </table>
- </div>
- <div class="to_print" id="second_element">
- <hr>
- <table class="table table-bordered table-striped">
- <thead>
- <tr class="bg-gradient bg-dark text-white">
- </tr>
- </thead>
- <tbody>
- <tr>
- </tr>
- <tr>
- </tr>
- <tr>
- </tr>
- <tr>
- </tr>
- <tr>
- </tr>
- </tbody>
- </table>
- </div>
- </div>
- <hr>
- </div>
- </body>
- </html>
Creating the JavaScirip/jQuery Script
The code below is the javascript/jquery script for printing the elements. The function below is being executed when Print Buttons are triggered. Save this file as script.js and include the file in your index.html file.
- function print_element($element_id = null) {
- if ($element_id == null) {
- // Alert Message when function was triggered without a element_id
- alert("No Element ID Selected");
- } else {
- // Cloning the specific element to print
- var el = $('#' + $element_id).clone()
- // removing the button incuded on the element
- el.find('button').remove()
- // cloning the element which contains the CSS for styling user-interface
- var head = $('head').clone()
- // creating a temporary container of the element to print
- var new_html = $('<html>')
- head.find('title').append(' - Print View')
- // adding the css to temporary container element
- new_html.append(head)
- new_html.append('<main></main>')
- // adding the element to temporary container element
- new_html.find('main').append(el)
- // Opening a new window (Pop-up) for the print view
- var new_window = window.open('', '_blank', 'location=no,width=900,height=700,left=250')
- // adding the content of temporary element to the new window
- new_window.document.write(new_html.html())
- // closing the new window document
- new_window.document.close()
- setTimeout(() => {
- // Trigger Print View
- new_window.print()
- setTimeout(() => {
- // Automatically closes the pop window after printing / canceling print view
- new_window.close()
- }, 200)
- }, 200);
- }
- }
That's it! You can now test the source code you created on your end and see if it works as we planned. If there's an error occurred, kindly review the source code I provided above. Working source code is also provided in this article. Download Button is located below.
Result Snapshots
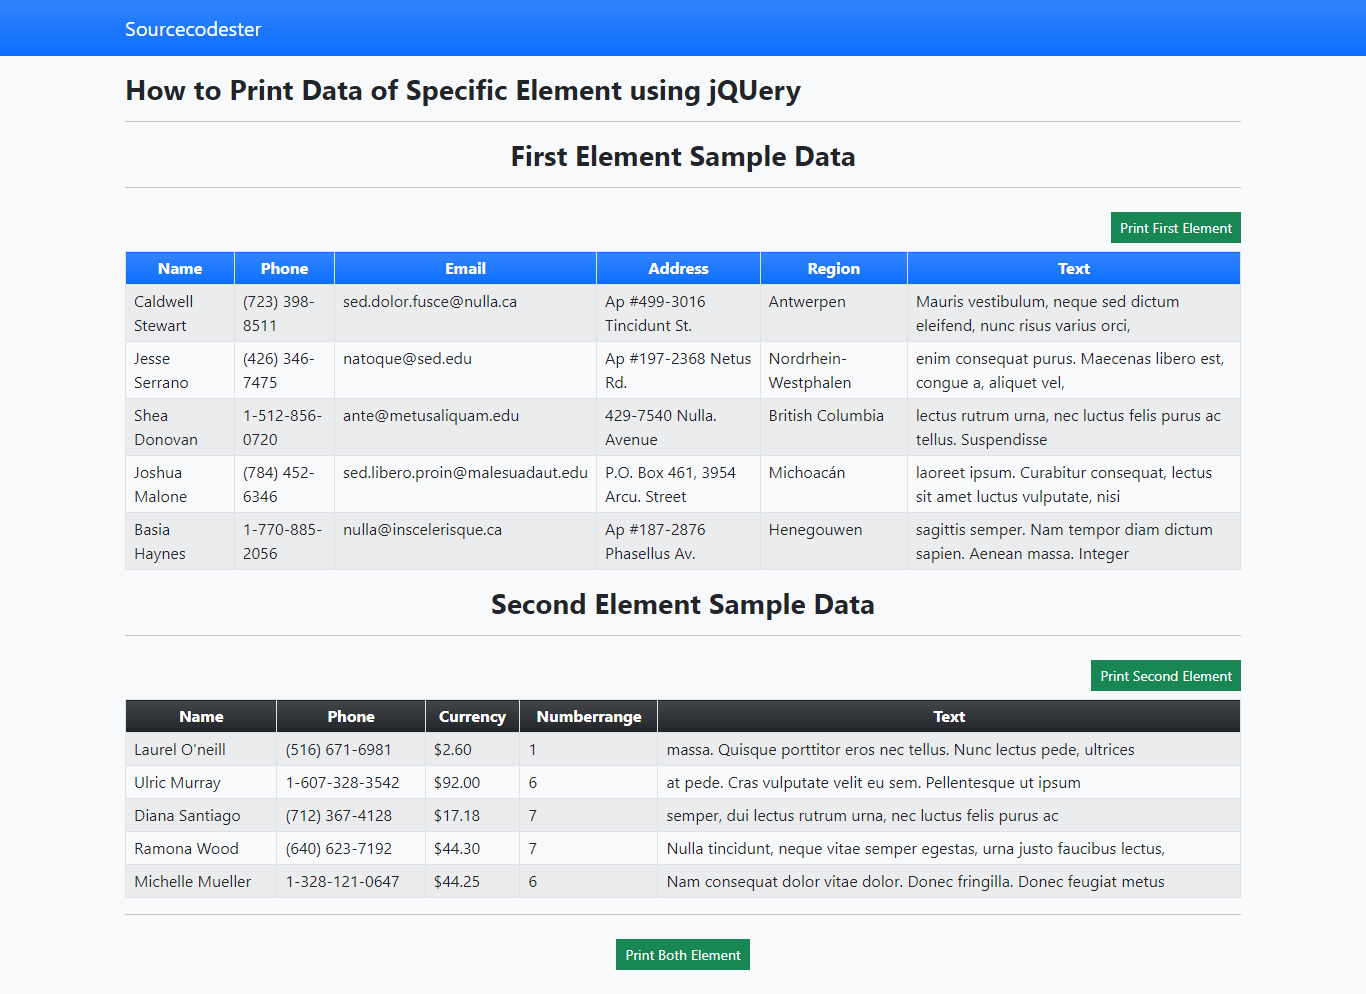
Page Interface

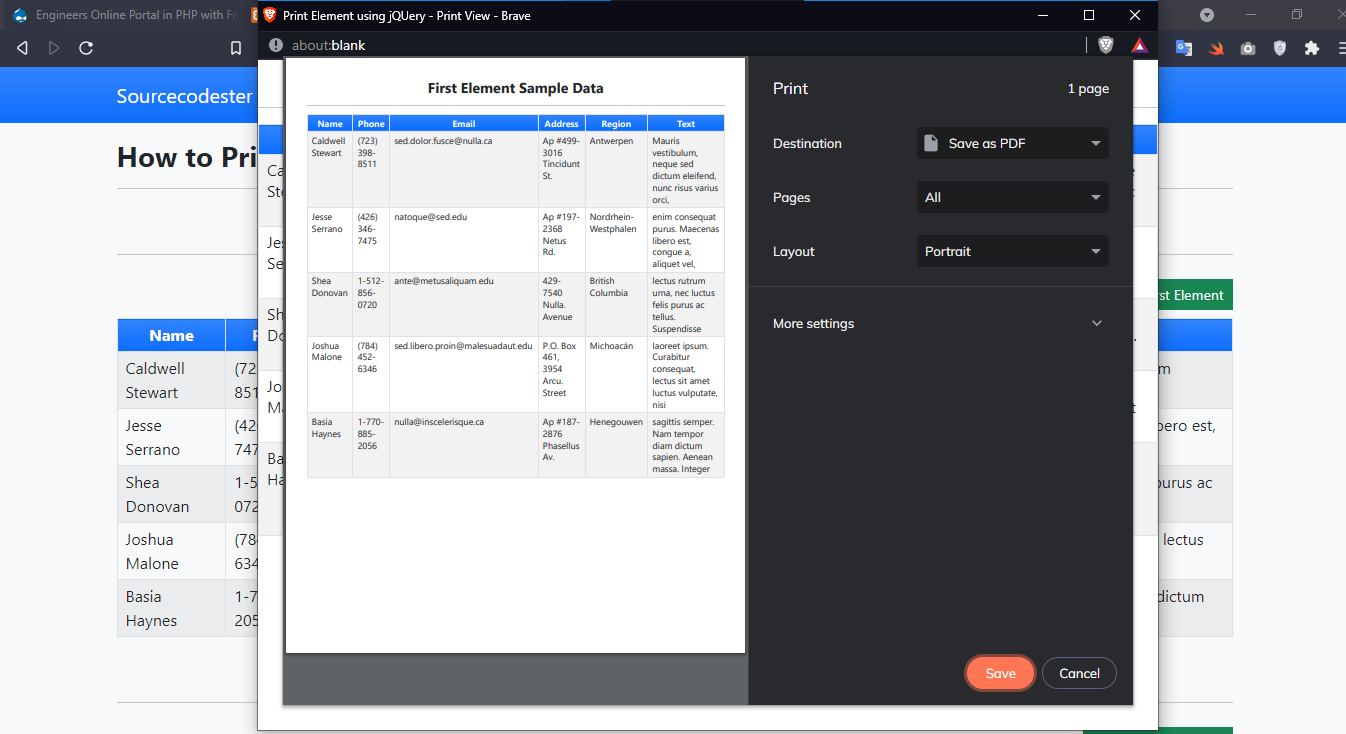
Page Print Preview

DEMO VIDEO
That ends this tutorial. I hope this tutorial will help you with what you are looking for and you'll find this useful for your future web application projects.
Explore more on this website for more Tutorials and Free Source Codes.

