Step-by-Step Guide to Building a Simple Flashcard App with HTML, CSS, and JavaScript
In this tutorial, we will explore how to create a Simple Flashcard Application using HTML, CSS, JavaScript (JS), and jQuery. This step-by-step guide is designed to help you build an interactive and user-friendly flashcard app that can be used for studying, quizzes, or learning new concepts effectively.
What is a Flashcard App?
A Flashcard App is a digital tool designed to help users learn and memorize information efficiently. It mimics the traditional flashcard learning method, where each card contains a question or term on one side and the corresponding answer or explanation on the other. Flashcard apps are widely used for studying, language learning, and mastering various topics due to their interactive and engaging approach.
Here, we will build a Flashcard Application with a focus on simplicity and essential functionality. This application will include key features such as the ability to add and remove flashcards and flip flashcards to view either the question or the answer side. These core features make it an excellent starting point for creating an interactive and customizable learning tool.
Let's Begin the Coding Side
Step 1: Creating the Main Elements
First, let's create the HTML file for our Flashcard Application. This file will include the essential elements such as the form fields for adding new flashcards and the display area for viewing the flashcards. The structure is designed to ensure functionality and ease of use. Check out the script below for detailed insights into this step.
index.html
- <!DOCTYPE html>
- <html lang="en">
- <head>
- <meta charset="UTF-8">
- <meta name="viewport" content="width=device-width, initial-scale=1.0">
- <link rel="stylesheet" href="https://fonts.googleapis.com/css2?family=Material+Symbols+Outlined:opsz,wght,FILL,[email protected],100..700,0..1,-50..200" />
- <link rel="stylesheet" href="style.css">
- </head>
- <body>
- <div id="main-container">
- <div class="flashcard-action">
- <button id="btn-new-flashcard">
- Add New Flashcard
- </button>
- </div>
- </div>
- <div id="form-modal">
- <div class="form-modal-backdrop">
- <div class="form-modal-dialog">
- <form action="" id="flashcard-form">
- <input type="hidden" id="fc_id">
- <div class="form-group">
- </div>
- <div class="form-group">
- </div>
- <div class="form-group-action">
- </div>
- </form>
- </div>
- </div>
- </div>
- </body>
- </html>
Step 2: Desiging the Elements
Next, let's create the Cascading Stylesheet (CSS) for the Flashcard Application. This CSS file will include the style rules that define the visual appearance of the application's elements, such as layout, colors, and typography. Additionally, it will include animations and transitions to enhance the interactivity and user experience when flipping the flashcards. Check out the style script below for more details.
style.css
- @import url('https://fonts.googleapis.com/css2?family=DynaPuff:[email protected]&family=Ubuntu:ital,wght@0,300;0,400;0,500;0,700;1,300;1,400;1,500;1,700&display=swap');
- * {
- box-sizing: border-box;
- font-family: "Ubuntu", serif;
- font-weight: 300;
- font-style: normal;
- }
- .dynapuff-font {
- font-family: "DynaPuff", serif;
- font-optical-sizing: auto;
- font-style: normal;
- font-variation-settings:
- "wdth" 100;
- }
- b,
- strong {
- font-family: "Ubuntu", serif;
- font-weight: 700;
- font-style: normal;
- }
- i {
- font-family: "Ubuntu", serif;
- font-weight: 400;
- font-style: italic;
- }
- html,
- body {
- margin: unset;
- padding: unset;
- height: 100%;
- min-height: 100%;
- width: 100%;
- min-width: 100%;
- overflow: auto;
- }
- body {
- display: flex;
- flex-flow: column wrap;
- justify-content: center;
- align-items: center;
- background-color: #ebedee;
- background-image: linear-gradient(120deg, #fdfbfb 0%, #ebedee 100%);
- }
- #main-container {
- width: 100%;
- max-height: 100%;
- max-width: 700px;
- padding: 15px 15px;
- }
- #app-title {
- font-weight: 700;
- text-align: center;
- }
- .flashcards {
- width: 100%;
- display: inline-grid;
- gap: 1rem;
- grid-template-columns: repeat(auto-fit, calc((100% - 2rem) / 3));
- align-items: center;
- justify-content: center;
- padding: 15px 0;
- }
- @media (max-width: 700px) {
- div.flashcards {
- grid-template-columns: repeat(auto-fit, calc((100% - 1rem) / 2));
- }
- }
- @media (max-width: 400px) {
- div.flashcards {
- grid-template-columns: 1fr;
- }
- }
- .flashcards:empty:before {
- display: block;
- position: relative;
- content: "No Flashcard Listed Yet";
- width: 100%;
- text-align: center;
- font-style: italic;
- color: #c8c5c5;
- }
- .flashcards .card {
- background-color: transparent;
- width: 100%;
- height: 300px;
- /* border: 1px solid #f1f1f1; */
- perspective: 1000px;
- cursor: pointer;
- }
- .flashcards .card.active .card-container {
- transform: rotateY(180deg);
- }
- .flashcards .card .card-container {
- position: relative;
- width: 100%;
- height: 100%;
- text-align: center;
- transition: transform 0.8s;
- transform-style: preserve-3d;
- }
- .flashcards .card .card-front,
- .flashcards .card .card-back {
- position: absolute;
- display: flex;
- flex-flow: column wrap;
- width: 100%;
- height: 100%;
- -webkit-backface-visibility: hidden;
- backface-visibility: hidden;
- overflow: hidden;
- border-radius: 5px;
- box-shadow: 3px 3px 4px #00000087;
- padding: 15px 5px;
- }
- .flashcards .card .card-front-title,
- .flashcards .card .card-back-title{
- letter-spacing: 1px;
- }
- .flashcards .card .card-front-text,
- .flashcards .card .card-back-text{
- flex-grow: 1;
- display: flex;
- align-items: center;
- justify-content: center;
- padding: 5px;
- font-size: 12px;
- letter-spacing: 1px;
- }
- .flashcards .card .card-front {
- background-color: #2E5077;
- color: #fff;
- }
- .flashcards .card .card-back {
- background-color: #A5BFCC;
- color: white;
- transform: rotateY(180deg);
- }
- button.card-action {
- background: #F95454;
- color: #fff;
- border: unset;
- outline: unset;
- cursor: unset;
- border-radius: 3px;
- }
- button.card-action:hover, button.card-action:active{
- background: #b22d2d;
- }
- div#form-modal {
- position: fixed;
- display: none;
- width: 100%;
- height: 100%;
- top: 0;
- left: 0;
- opacity: 0;
- transition: all .5s ease-in-out;
- }
- div#form-modal.shown {
- display: block;
- opacity: 1;
- }
- div#form-modal .form-modal-backdrop {
- display: flex;
- width: 100%;
- height: 100%;
- background: #000000c2;
- backdrop-filter: blur(2px);
- align-items: center;
- justify-content: center;
- }
- div#form-modal .form-modal-dialog {
- position: relative;
- width: 100%;
- max-width: 350px;
- background: #fff;
- border-radius: 10px;
- padding: 15px 10px;
- }
- div#form-modal .form-modal-dialog .form-modal-title {
- margin: unset;
- }
- button.form-modal-close {
- background: transparent;
- border: unset;
- cursor: pointer;
- position: relative;
- float: right;
- }
- .form-group {
- position: relative;
- width: 100%;
- padding: 5px 0px;
- }
- label.form-label {
- display: block;
- width: 100%;
- font-weight: 400;
- color: #434343;
- margin-bottom: 5px;
- font-size: 14px;
- }
- .form-control {
- width: 100%;
- resize: none;
- border-color: #848383;
- border-radius: 2px;
- outline: unset;
- }
- .form-group-action {
- position: relative;
- width: 100%;
- padding: 5px 0px;
- display: flex;
- align-items: center;
- justify-content: center;
- }
- button#btn-new-flashcard {
- display: flex;
- align-items: center;
- justify-content: center;
- background: #0556be;
- color: #fff;
- padding: 5px 25px;
- border: unset;
- border-radius: 3px;
- font-weight: 500;
- cursor: pointer;
- float: right;
- }
- button.btn-form-action {
- background: #0556be;
- color: #fff;
- padding: 5px 25px;
- border: unset;
- border-radius: 3px;
- font-weight: 500;
- cursor: pointer;
- }
- button.btn-form-action:hover, button.btn-form-action:active{
- background: #247df0;
- }
Step 3: Creating the App Functionality
Lastly, let's create the JavaScript file for the Flashcard Application. This file is the backbone of the application's functionality, enabling features such as storing and loading flashcard data, opening the flashcard creation form modal, flipping cards to reveal the answer, and other interactive behaviors. By implementing these functionalities, we can create a dynamic and user-friendly flashcard application. Check out the script below for details.
script.js
- // Flashcard item element
- const flashcard_item = $(`<div class="card">
- <div class="card-container">
- <div class="card-front">
- <h4 class="card-front-title dynapuff-font">Question</h4>
- <div class="card-front-text dynapuff-font">Sample only 123</div>
- <div class="card-back-action"><button class="card-action"><span class="material-symbols-outlined">delete</span></button></div>
- </div>
- <div class="card-back">
- <h4 class="card-back-title dynapuff-font">Answer</h4>
- <div class="card-back-text dynapuff-font">Sample only 123</div>
- </div>
- </div>
- </div>`)
- // Flashcard Items Container
- const flashcardContainer = $(`.flashcards`)
- // Flashcard Form Modal
- const flashcardModal = $(`#form-modal`)
- // Flashcard Form
- const FCForm = $(`#flashcard-form`)
- // New Flashcard Item Button
- const newFCButton = $(`#btn-new-flashcard`)
- // Flashcard Modal Close Button
- const FCCloseButton = $(`#form-modal .form-modal-close`)
- // Stored Flashcard Data
- var FCData = localStorage.getItem('fc_data') || '[]';
- FCData = JSON.parse(FCData);
- // New Flashcard Button Click Event Listener
- newFCButton.click(function (e) {
- e.preventDefault();
- FCForm[0].reset();
- $('#fc_id').val("")
- flashcardModal.addClass("shown");
- })
- // Flashcard Modal Close Button Click Event Listener
- FCCloseButton.click(function (e) {
- e.preventDefault()
- FCForm[0].reset();
- $('#fc_id').val("")
- if (flashcardModal.hasClass("shown"))
- flashcardModal.removeClass("shown");
- })
- // Generate New Flashcard Item ID
- function generateNewID() {
- var id = 0;
- if (FCData.length > 0) {
- for (var i = 0; i < FCData.length; i++) {
- if (id < FCData[i].id) {
- id = FCData[i].id;
- }
- }
- }
- id++;
- return id;
- }
- // New Flashcard submit event
- FCForm.submit(function (e) {
- e.preventDefault();
- var id = $('#fc_id').val()
- if (id == "") {
- id = generateNewID();
- FCData.push({ id: id, question: $(`#question`).val(), answer: $(`#answer`).val() });
- } else {
- for (var i = 0; i < FCData.length; i++) {
- if (id == FCData[i].id) {
- FCData[i] = { id: id, question: $(`#question`).val(), answer: $(`#answer`).val() };
- }
- }
- }
- FCForm[0].reset();
- $('#fc_id').val("")
- localStorage.setItem("fc_data", JSON.stringify(FCData));
- load_flashcards();
- if (flashcardModal.hasClass("shown"))
- flashcardModal.removeClass("shown");
- })
- // Load Flashcard Items
- function load_flashcards() {
- flashcardContainer.html("")
- for (var i = 0; i < FCData.length; i++) {
- var data = FCData[i];
- var fc_item = flashcard_item.clone(true);
- fc_item.find(`.card-front-text`).text(data.question)
- fc_item.find(`.card-back-text`).text(data.answer)
- fc_item[0].dataset.id = data.id
- flashcardContainer.append(fc_item)
- // Flashcard item card flip event to view answer
- fc_item.click(function (e) {
- e.preventDefault()
- var buttonHtml = new RegExp(($(this).find("button.card-action")[0].outerHTML), "i");
- if ($.contains($(this).find("button.card-action")[0], e.target) || $(this).find("button.card-action")[0] == e.target)
- return;
- if ($(this).hasClass("active")) {
- $(this).removeClass("active")
- } else {
- $(this).addClass("active")
- }
- })
- // Flashcard item card delete button event
- fc_item.find("button.card-action").click(function (e) {
- e.preventDefault()
- var id = $(this).closest(".card")[0].dataset.id
- if (confirm(`Are you sure to delete this Flashcard Item`)) {
- for (var z = 0; z < FCData.length; z++) {
- if (id == FCData[z].id) {
- delete FCData[z];
- FCData = FCData.filter(elm => elm)
- localStorage.setItem("fc_data", JSON.stringify(FCData));
- load_flashcards();
- }
- }
- }
- })
- }
- }
- $(document).ready(function () {
- // Load flashcards
- load_flashcards();
- })
Snapshots
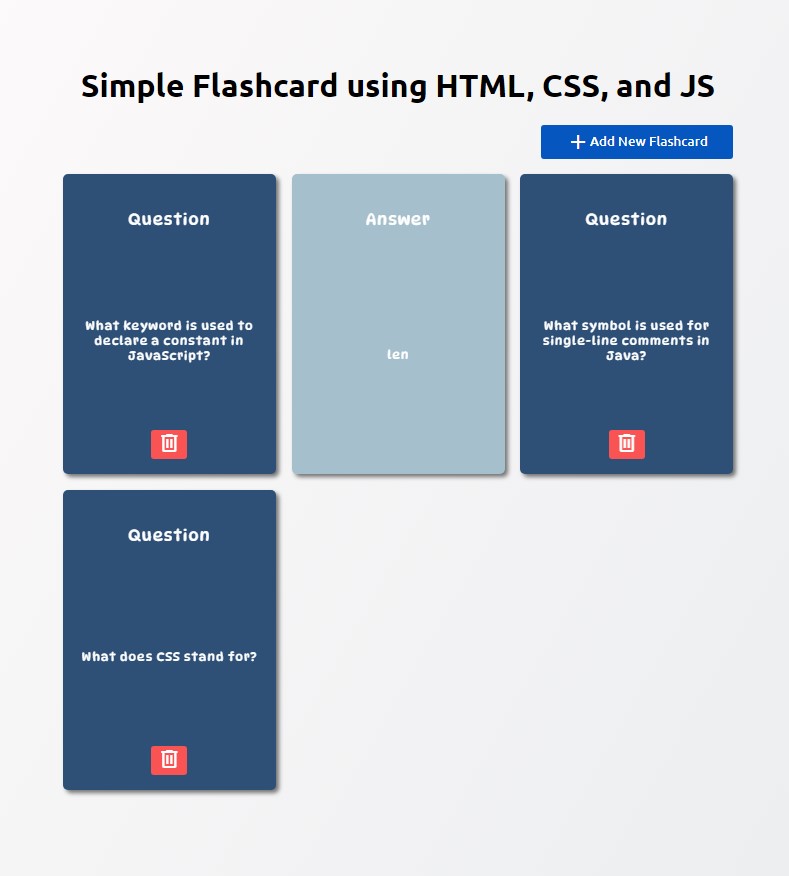
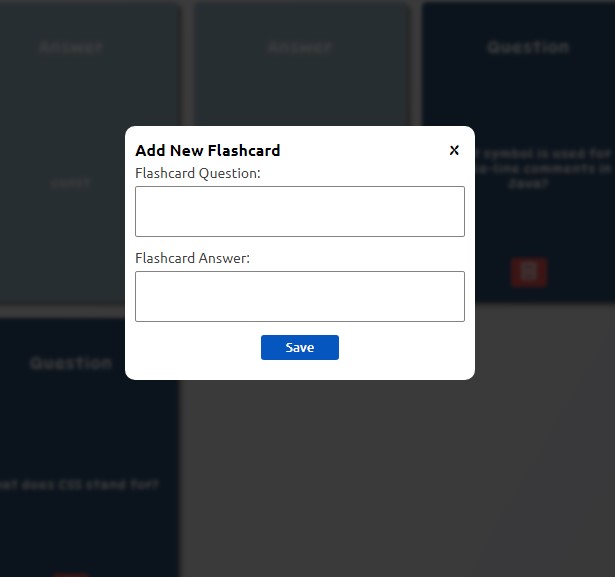
Here are the following snapshots of the Flashcard Application source code that I provided above.
App's Whole Page
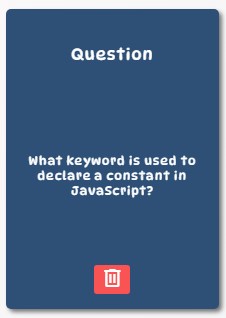
Flashcard's Question Side
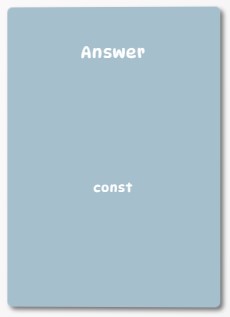
Flashcard's Answer Side
New Flashcard Item Form Modal
And that's it! The complete source code for the Simple Flashcard Application created in this tutorial is available as a downloadable zip file. Feel free to download it and customize the code to suit your specific needs or incorporate it into your own projects. This source code serves as a flexible foundation for building a more advanced and personalized flashcard application.
I hope this Flashcard Application Tutorial using HTML, CSS, and JavaScript has provided you with valuable insights and will help you in your future web application projects. Feel free to explore more content on this website, where you'll find additional Tutorials, Free Source Codes, and Articles covering a wide range of programming languages and frameworks.
Happy Coding =)
Add new comment
- 315 views

