Creating a Skeleton Loader using JavaScript and CSS Tutorial
In this tutorial, you will learn how to Create a Simple Skeleton Loader for your websites or web applications data container using JavaScript and CSS. The tutorial aims to provide the IT/CS students, self-learners, or beginners with a reference for enhancing their knowledge and skills for developing a creative web application using JS and CSS. Here, snippets will be provided so you will have a better idea of achieving the goal of this tutorial. A sample source code zip file is also provided and is free to download.
What is Skeleton Loader?
Skeleton Loader is a kind of loader for information containers that are still loading or in progress. This is a static or animated placeholder that will be shown on the client side end while waiting for the data or information to be successfully loaded on the page. This loader also represents the view design of the data in the container whereas text fields, images, etc are presented with blank content and located as the data suppose to be.
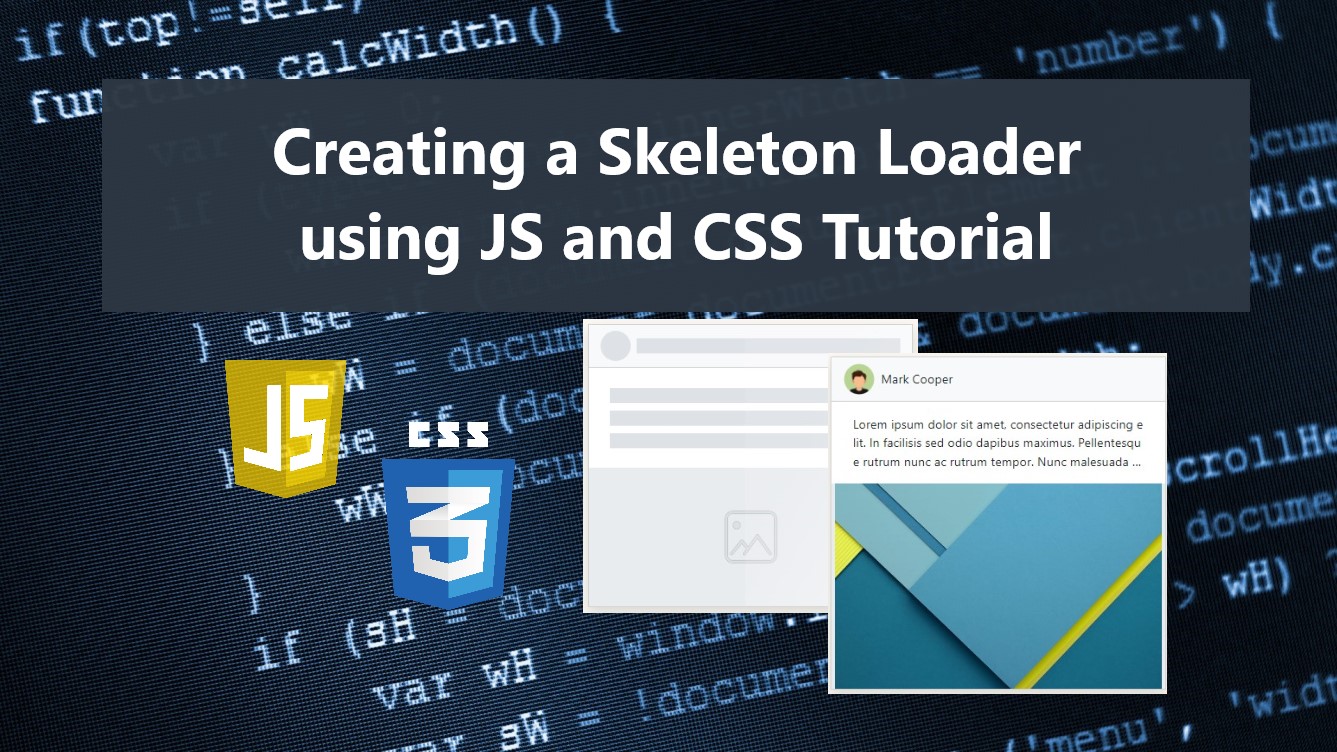
Here's an example page interface that displays a skeleton loader:

Here's an example page interface when the data is/are successfully loaded:

How to Create a Skeleton Loader?
Skeleton Loader can be achieved using JavaScript and CSS. The CSS will handle the design and the animation of the loader while the JS will manipulate the content/information container before and after the data loads successfully.
Note, the skeleton loader design depends on how your actual data is being displayed on your websites or web applications. I will be only giving an example using a simple social media/network site for educational purposes only.
Example
Here are the example scripts for building a simple web page with a Skeleton Loader Feature. Aside from JS and CSS, I also used the Bootstrap Framework library for some of the page interface designs.
Stylesheet
The below code is a CSS Script for the custom design of the application post containers, skeleton loader, and other elements of the page interface.
assets/css/styles.css
- html, body{
- min-height:100%;
- width:100%;
- background-color: #FBF8F1;
- }
- .truncate-3{
- display: -webkit-box;
- -webkit-line-clamp:3;
- -webkit-box-orient: vertical;
- word-break: break-all;
- overflow: hidden;
- hyphens: auto;
- width:100%;
- }
- body>main{
- height: 100%;
- width: 100%;
- display: flex;
- flex-direction: column;
- }
- body>main>nav, body>main>footer{
- flex-shrink: 1;
- }
- div#main-wrapper{
- flex-grow: 1;
- overflow: auto;
- position:relative;
- min-height: 70vh;
- }
- main>nav{
- background-color: #0072b2 !important;
- }
- main>footer {
- background-color: #f3efe6;
- }
- /**
- * Post Designs
- */
- .user-img-container{
- width: 40px;
- height: 40px;
- border-radius: 50% 50%;
- }
- .post-img-single-container:not(:empty){
- width: 100%;
- min-height: 35vh;
- background-color: var(--bs-gray-200);
- padding: 0 5px;
- }
- /**
- * Skeleton Loader Post Designs
- */
- .skl-load{
- position: relative;
- overflow: hidden !important;
- }
- .skl-load .user-img-container,
- .skl-load .text-col{
- background: var(--bs-gray-300);
- background-color: var(--bs-gray-300);
- }
- .skl-load .text-col{
- width: 100%;
- min-height: 20px;
- margin:10px 0 ;
- }
- .skl-load .post-img-single-container{
- height: 100%;
- width: 100%;
- display: flex;
- align-items: center;
- justify-content: center;
- min-height: 35vh;
- background-color: var(--bs-gray-200);
- padding: 0 5px;
- }
- .skl-load .post-img-single-container:before{
- position: absolute;
- height: 150px;
- width: 150px;
- display: flex;
- background-image: url(./../img/img-icon.png);
- background-size: 150px 150px;
- content: "";
- opacity: .3;
- }
- .skl-load:after {
- content: "";
- position: absolute;
- height: 100%;
- width: 100%;
- background: linear-gradient(120deg, rgb(254 254 254 / 8%) 24%, rgb(255 255 255 / 32%) 50%, rgb(254 254 254 / 13%) 77%);
- transform: translateX(-100%);
- z-index: 2;
- animation: shine 1.5s infinite 3s;
- }
- @keyframes shine {
- 0%{
- transform: translateX(-100%);
- }
- 100%{
- transform: translateX(100%);
- }
- }
Page Interface
The below code is an HTML script that contains the different containers and elements of the application's page. The script contains a navbar, footer, and cards for post items.
index.html
- <!DOCTYPE html>
- <html lang="en">
- <head>
- <meta charset="UTF-8">
- <meta http-equiv="X-UA-Compatible" content="IE=edge">
- <meta name="viewport" content="width=device-width, initial-scale=1.0">
- <link rel="stylesheet" href="https://cdnjs.cloudflare.com/ajax/libs/font-awesome/6.2.0/css/all.min.css" integrity="sha512-xh6O/CkQoPOWDdYTDqeRdPCVd1SpvCA9XXcUnZS2FmJNp1coAFzvtCN9BmamE+4aHK8yyUHUSCcJHgXloTyT2A==" crossorigin="anonymous" referrerpolicy="no-referrer" />
- <link rel="stylesheet" href="https://cdn.jsdelivr.net/npm/[email protected]/dist/css/bootstrap.min.css">
- <link rel="stylesheet" href="assets/css/styles.css">
- <script src="https://cdn.jsdelivr.net/npm/[email protected]/dist/js/bootstrap.bundle.min.js"></script>
- <style>
- .material-symbols-outlined {
- font-variation-settings:
- 'FILL' 0,
- 'wght' 200,
- 'GRAD' 0,
- 'opsz' 48
- }
- </style>
- </head>
- <body>
- <main>
- <nav class="navbar navbar-expand-lg navbar-dark bg-gradient">
- <div class="container">
- </div>
- </nav>
- <div id="main-wrapper">
- <div class="container-md px-5 my-3">
- <div class="col-lg-6 col-md-8 col-sm-10 col-xs-12 mx-auto" id="posts">
- <div class="card shadow rounded-0 post-item mb-3">
- <div class="card-header bg-light">
- <!-- User Information -->
- <div class="d-flex align-items-center">
- <div class="col-auto">
- </div>
- <div class="flex-grow-1 flex-shrink-1 ms-2 user-name-container">
- </div>
- </div>
- <!-- End of User Information -->
- </div>
- <div class="card-body rounded-0">
- <div class="container-fluid">
- <div class="card-description truncate-3 post-description">
- </div>
- </div>
- </div>
- <div class="card-img-top">
- </div>
- </div>
- </div>
- </div>
- </div>
- <footer class="shadow-top py-4 col-auto">
- <div class="">
- <div class="text-center">
- </div>
- <div class="text-center">
- <a href="mailto:[email protected]" class="text-decoration-none text-body-secondary">[email protected]</a>
- </div>
- </div>
- </footer>
- </main>
- </body>
- </html>
Sample Data
The following JSON Data are the sample information that will be loaded on the application page. It contains the list of posts' user information, details, and images path.
data.json
- [{
- "username": "Mark Cooper",
- "user_image_path": "./assets/img/man_avatar.png",
- "post_description": "Lorem ipsum dolor sit amet, consectetur adipiscing elit. In facilisis sed odio dapibus maximus. Pellentesque rutrum nunc ac rutrum tempor. Nunc malesuada diam eget tempus pulvinar. Donec non sodales nibh, id auctor dui. Suspendisse nec dolor nisl. Phasellus in iaculis arcu, non euismod mauris. Sed non mi quis dui luctus vestibulum.",
- "post_image_path": "./assets/img/smp-img.jpg"
- },
- {
- "username": "John Smith",
- "user_image_path": "./assets/img/man_avatar.png",
- "post_description": "Aenean condimentum ornare sodales. Nunc pharetra vestibulum risus, ac luctus nunc consectetur imperdiet. Curabitur ultricies mollis neque, in iaculis dolor dictum a. Morbi imperdiet dolor venenatis dolor consectetur rhoncus consectetur sit amet urna. Mauris accumsan lorem eu justo vestibulum porta.",
- "post_image_path": "./assets/img/smp-img-2.jpg"
- }]
JavaScript
The below code is the JavaScript file that contains the scripts for creating the container element of the sample data and applying a skeleton loader feature. In the script below, you can see that I used the setTimeout() function of JS to delay the process of showing the data on their designated containers.
assets/js/skeleton-loader.js
- // Loader Class Name
- const skeletonClassName = "skl-load"
- // Loader Text Fields default text-field
- const sklTxtField = `<div class="text-col w-100 h-100"></div>`
- // Posts Container
- const postsField = document.getElementById('posts')
- // Clone Post Cart item
- const postItemClone = document.querySelectorAll('.post-item')[0].cloneNode(true)
- // Posts JSON Data
- let postData;
- // Retrieve Post Data
- fetch('./data.json')
- .then(response => {
- return response.json()
- })
- .then(responseData=>{
- postData = responseData
- // Add New Post Item if data is more than 1
- Object.keys(responseData).map(k=>{
- if(k > 0){
- postsField.appendChild(postItemClone.cloneNode(true))
- }
- })
- // Select all post items
- const postItem = document.querySelectorAll('.post-item')
- postItem.forEach((el,k)=>{
- // Create a Skeleton Loader in post items
- createSkeletonLoader(el)
- setTimeout(()=>{
- // Load the data
- loadData(el,k)
- },6000)
- })
- // Skeleton Creator Function
- function createSkeletonLoader(postCard){
- postCard.classList.add(skeletonClassName)
- postCard.querySelector('.user-name-container').innerHTML = `${sklTxtField}`
- postCard.querySelector('.post-description').innerHTML = `${sklTxtField}${sklTxtField}${sklTxtField}`
- }
- // Post Items data loader
- function loadData(postCard, dataKey){
- var post = postData[dataKey]
- postCard.querySelector('.user-name-container').innerHTML = `${post.username}`;
- postCard.querySelector('.user-img-container').innerHTML = `<img class="img-fluid" src="${post.user_image_path}" alt="${post.username} Avatar">`;
- postCard.querySelector('.post-description').innerHTML = `${post.post_description}`;
- postCard.querySelector('.post-img').innerHTML = `<img class="img-fluid" src="${post.post_image_path}" alt="${post.username} Post Image">`;
- if(postCard.classList.contains(skeletonClassName))
- postCard.classList.remove(skeletonClassName)
- }
- })
- .catch(error=>{
- console.error(error)
- })
Snapshots
As the result of the scripts that are provided above, the skeleton loader would be something like the following image:

And after the data has loaded successfully, the skeleton loader will be changed into something like the following image:

DEMO VIDEO
Please note that if you use the provided scripts and sample data above, change the image paths on the sample JSON data with the image paths that are available on your end. You can also download the full source code that I created for this tutorial so you will have an actual demonstration of the output of the provided scripts on your end. The download button is located below this tutorial's content.
That's it! That's the end of this tutorial. I hope that this Creating a Skeleton Loader using JavaScript and CSS Tutorial will help you with what you are looking for and will be useful for your current and future web application projects.
Explore more on this website for more Tutorials and Free Source Codes.