PHP - How To Upload CSV File Into MySQLi
Submitted by razormist on Tuesday, June 27, 2017 - 18:20.
Language
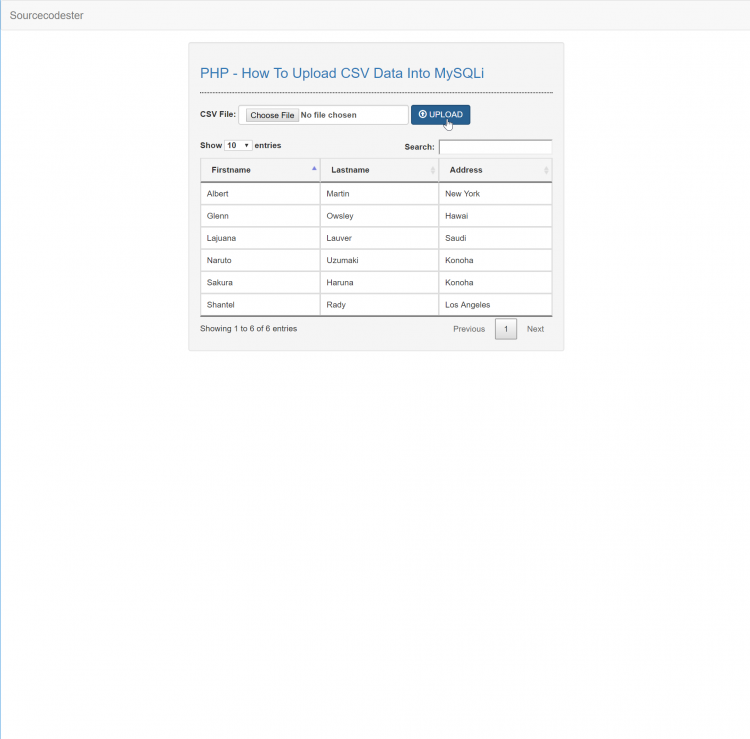
In this tutorial we will try to upload a CSV File Into MySQLi. This simple script can process and insert the CSV file into MySQli Database. It can lessen and fasten your database processing if your csv is already have a data. So let's do the coding.
Before we started:
First you have to download & install WAMPserver or any local server that run PHP scripts. Here's the link for WAMP server http://www.wampserver.com/en/.
Creating the database Connection
This is the where the database connection, just simple copy/paste the provided code below.
The Main Interface
This is where the main layout is located, to make this one just simply copy/paste the code below.
The Upload Script
This is where the upload script occur, this script will handle the processing of the CSV file. Then later will be upload to MySQLi database server to be display in a web interface. To do that just simply copy/paste the code below.
There you have it we simple Upload a CSV file into the MySQLi database. I hope that this simple tutorial help you for what you are looking for. For more updates and tutorial just kindly visit this site. Enjoy Coding!!
- <?php
- $conn = new mysqli("localhost", "root", "", "phptut");
- if(!$conn){
- }
- ?>
- <!DOCTYPE HTML>
- <?php
- require 'connect.php';
- ?>
- <html lang = "en">
- <head>
- <title>PHP - How To Upload CSV Data Into MySQLi</title>
- <meta charset = "UTF-8" name = "viewport" content = "width=device-width, initial-scale=1" />
- <link rel = "stylesheet" type = "text/css" href = "css/bootstrap.css" />
- <link rel = "stylesheet" type = "text/css" href = "css/jquery.dataTables.css"/>
- </head>
- <body>
- <nav class = "navbar navbar-default">
- <div class = "container-fluid">
- <a class = "navbar-brand" href = "https://sourcecodester.com">Sourcecodester</a>
- </div>
- </nav>
- <div class = "col-md-3"></div>
- <div class = "col-md-6 well">
- <h3 class = "text-primary">PHP - How To Upload CSV Data Into MySQLi</h3>
- <hr style = "border-top:1px dotted #000;"/>
- <form action = "upload.php" class = "form-inline" method = "POST" enctype = "multipart/form-data">
- <div class = "form-group">
- <label>CSV File: <input type = "file" name = "file" class = "form-control"/></label>
- <button type = "submit" name = "save" class = "btn btn-primary form-control"><span class = "glyphicon glyphicon-upload"></span> UPLOAD</button>
- </div>
- </form>
- <br />
- <table id = "table" class = "table table-bordered">
- <thead>
- <tr>
- <th>Firstname</th>
- <th>Lastname</th>
- <th>Address</th>
- </tr>
- </thead>
- <tbody>
- <?php
- $query = $conn->query("SELECT * FROM `member`");
- while($fetch = $query->fetch_array()){
- ?>
- <tr>
- <td><?php echo $fetch['firstname']?></td>
- <td><?php echo $fetch['lastname']?></td>
- <td><?php echo $fetch['address']?></td>
- </tr>
- <?php
- }
- ?>
- </tbody>
- </table>
- </div>
- </body>
- <script src = "js/jquery-3.2.1.js"></script>
- <script src = "js/jquery.dataTables.js"></script>
- <script type = "text/javascript">
- $(document).ready(function(){
- $('#table').DataTable();
- });
- </script>
- </html>
- <?php
- require 'connect.php';
- if($_FILES['file']['name']){
- if($filename[1] == 'csv'){
- $conn->query("INSERT INTO `member` (firstname, lastname, address) VALUES('$data[0]', '$data[1]', '$data[2]')");
- }
- }
- }
- }
- ?>
Note: Due to the size or complexity of this submission, the author has submitted it as a .zip file to shorten your download time. After downloading it, you will need a program like Winzip to decompress it.
Virus note: All files are scanned once-a-day by SourceCodester.com for viruses, but new viruses come out every day, so no prevention program can catch 100% of them.
FOR YOUR OWN SAFETY, PLEASE:
1. Re-scan downloaded files using your personal virus checker before using it.
2. NEVER, EVER run compiled files (.exe's, .ocx's, .dll's etc.)--only run source code.
Add new comment
- 739 views

