Record and Play Audio in VB.NET
Submitted by donbermoy on Saturday, June 7, 2014 - 09:37.

Today in VB.NET, i will teach you how to create a program that records and plays audio (microphone) using VB.NET.
Now, let's start this tutorial!
1. Let's start with creating a Windows Form Application for this tutorial by following the following steps in Microsoft Visual Studio: Go to File, click New Project, and choose Windows Application.
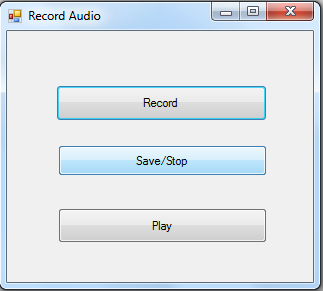
2. Next, add three buttons named Button1 as record button for recording audio, Button2 as save and stop button, and Button3 for playing the recorded audio. You must design your interface like this:
 3. Now, in your code module, create a function named record that will access the winmm.dll.
4. For record button for Button1, put this code below.
The function named record was called here to open a wav audio file that is named as recsound. Then this will record sound as you click the record button. Note: Provide headset with microphone in your PC or laptop for you to say the words to record.
4. For save and stop button for Button2, put this code below.
The recsound alias that we initialized in the record button was called here. This button will save the recorded audio file and saved into C directory and will named as mic.wav. Then after saving, we close the recorded sound.
5. For play button for Button3, put this code below.
We used the My namespace here and Play function in Audio to play the saved file in C Directory, the mic.wav, that we recorded its sound earlier.
Press F5 to run the program.
Best Regards,
Engr. Lyndon Bermoy
IT Instructor/System Developer/Android Developer/Freelance Programmer
If you have some queries, feel free to contact the number or e-mail below.
Mobile: 09488225971
Landline: 826-9296
E-mail:[email protected]
Add and Follow me on Facebook: https://www.facebook.com/donzzsky
Visit and like my page on Facebook at: https://www.facebook.com/BermzISware
3. Now, in your code module, create a function named record that will access the winmm.dll.
- Private Declare Function record Lib "winmm.dll" Alias "mciSendStringA" (ByVal lpstrCommand As String, ByVal lpstrReturnString As String, ByVal uReturnLength As Integer, ByVal hwndCallback As Integer) As Integer
- Private Sub Button1_Click(ByVal sender As System.Object, ByVal e As System.EventArgs) Handles Button1.Click
- record("open new Type waveaudio Alias recsound", "", 0, 0)
- record("record recsound", "", 0, 0)
- End Sub
- Private Sub Button2_Click(ByVal sender As System.Object, ByVal e As System.EventArgs) Handles Button2.Click
- record("save recsound c:\mic.wav", "", 0, 0)
- record("close recsound", "", 0, 0)
- End Sub
- Private Sub Button3_Click(ByVal sender As System.Object, ByVal e As System.EventArgs) Handles Button3.Click
- My.Computer.Audio.Play("c:\mic.wav")
- End Sub
Comments
follow direction
Please follow direction to use. Don't shortcut it by clicking play button. Click record and record your voice, then save the sound to create the way file then you can play it.
in Windows 10 you need to…
in Windows 10 you need to run App as admin to save to the C Drive but you can point it to the desktop or somewhere that is not the main Drive windows is installed on. I don't know if any other OS you have to do this on but I know windows 10 is one of them. Maybe that is you issue.