Drag and Drop - Uploading Multiple Files using Pure JavaScript Tutorial
In this tutorial, you will learn how to create or implement a Drag and Drop File Uploading using Pure JavaScript. This tutorial mainly aims to provide IT/CS Students and new programmers with a reference to handle file uploads on both the client and server sides. Here, the step-by-step tutorial for achieving the main objective is provided with snippets for better understanding. A sample web application source code zip file that demonstrates the tutorial's objective is also provided and is free to download.
What is Drag-and-Drop File Uploading?
Drag-and-Drop File Uploading is a process of handling file uploads on the client side. It allows the end user of a certain system or platform to simply drag the files they desire to upload and drop to a certain container or file drop zone on the platform page.
How to Create a Drag-and-Drop File using JavaScript?
Drag-and-Drop functionality can be achieved using the JavaScript EventListeners. Here are the following event listeners that can be used to achieve the said functionality:
- ondragover
- This event listener enables you to create a process, functions, or manipulations that will be triggered when the dragged file hovers over the drop zone field.
- ondragleave
- This event listener enables you to create a process, functions, or manipulations that will be triggered when the dragged file leaves the drop zone field.
- ondrop
- This event listener enables you to create a process, functions, or manipulations that will be triggered when the dragged file has been dropped at the drop zone field.
Sample Syntax
Here's a sample snippet that demonstrates how to use the said event listeners.
- document.getElementById('drop-zone').ondragover = function(event)
- {
- // Add something here
- }
- document.getElementById('drop-zone').ondragleave = function(event)
- {
- // Add something here
- }
- document.getElementById('drop-zone').ondrop = function(event)
- {
- // Add something here
- }
Example
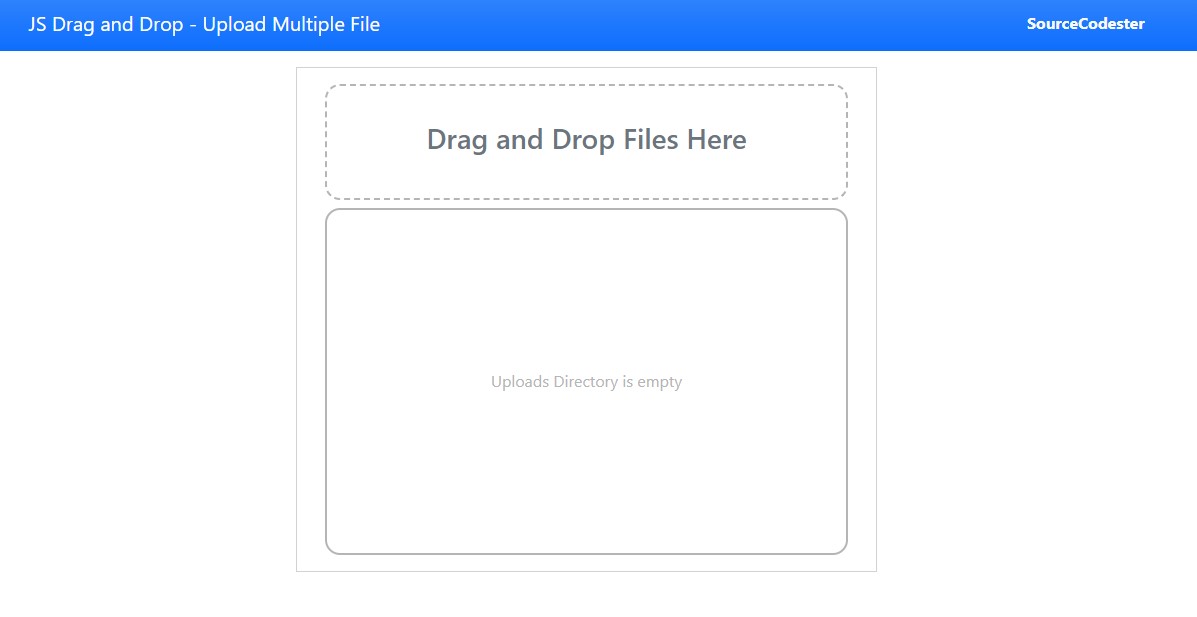
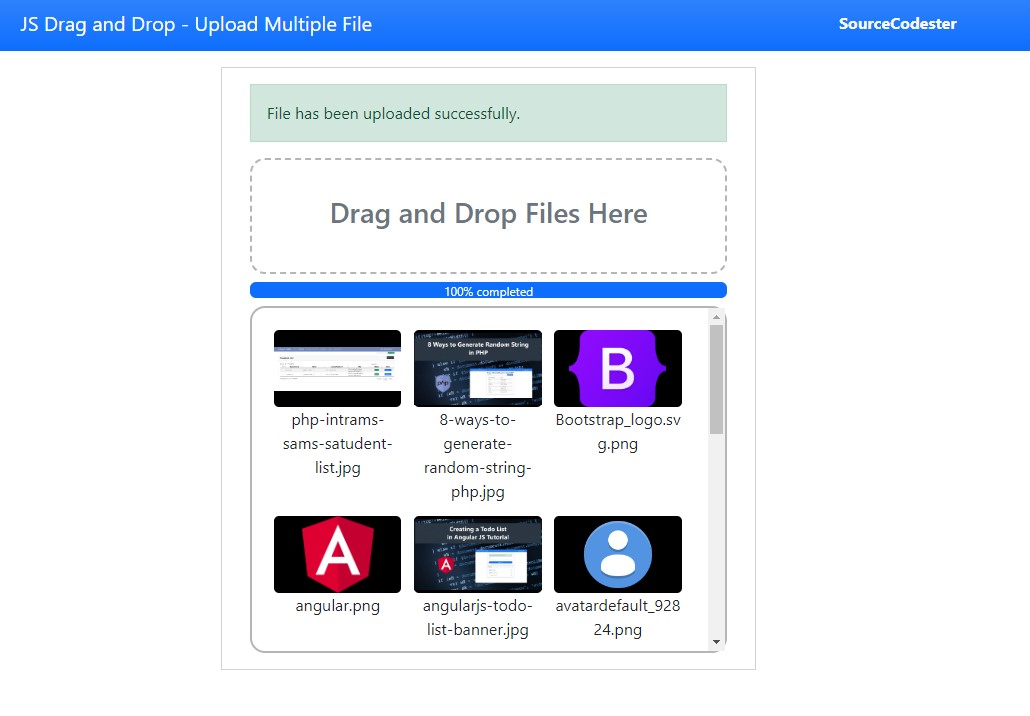
Here are the source code snippets of simple web applications that demonstrate the Drag-and-Drop Multiple File Upload with a progress bar using the 3 event listeners mentioned above. The application allows the end-users to upload multiple files by simply drag-and-drop the files on the application files drop zone. The uploading process to the server will be executed using the JS HTTP Request and PHP Script.
Interface
Here's the snippet of the application page interface. The file is a combined PHP and HTML script for displaying the file drop zone and uploaded files. I used Bootstrap v5 and Fontawesome Icons for the design of the interface which is loaded using CDNs. Save the file as index.php
- <!DOCTYPE html>
- <html lang="en">
- <head>
- <meta charset="UTF-8">
- <meta http-equiv="X-UA-Compatible" content="IE=edge">
- <meta name="viewport" content="width=device-width, initial-scale=1.0">
- <link rel="stylesheet" href="https://cdnjs.cloudflare.com/ajax/libs/font-awesome/6.2.0/css/all.min.css" integrity="sha512-xh6O/CkQoPOWDdYTDqeRdPCVd1SpvCA9XXcUnZS2FmJNp1coAFzvtCN9BmamE+4aHK8yyUHUSCcJHgXloTyT2A==" crossorigin="anonymous" referrerpolicy="no-referrer" />
- <link rel="stylesheet" href="https://cdn.jsdelivr.net/npm/[email protected]/dist/css/bootstrap.min.css" integrity="sha384-Zenh87qX5JnK2Jl0vWa8Ck2rdkQ2Bzep5IDxbcnCeuOxjzrPF/et3URy9Bv1WTRi" crossorigin="anonymous">
- <link rel="stylesheet" href="style.css">
- <script src="https://cdn.jsdelivr.net/npm/[email protected]/dist/js/bootstrap.bundle.min.js" integrity="sha384-OERcA2EqjJCMA+/3y+gxIOqMEjwtxJY7qPCqsdltbNJuaOe923+mo//f6V8Qbsw3" crossorigin="anonymous"></script>
- </head>
- <body>
- <nav class="navbar navbar-expand-lg navbar-dark bg-primary bg-gradient">
- <div class="container">
- <div>
- </div>
- </div>
- </nav>
- <div class="container-fluid px-5 my-3">
- <div class="col-lg-6 col-md-8 col-sm-12 mx-auto">
- <div class="card rounded-0">
- <div class="card-body rounded-0">
- <div class="container-fluid">
- <!-- Drag and Drop Field -->
- <div id="dd-field">
- </div>
- <div class="my-2">
- <div class="progress" id="upload-progress-holder" style="display:none">
- </div>
- </div>
- <div id="upload-field">
- <?php
- if(is_dir("uploads/")):
- $scandr = scandir("uploads/");
- foreach($scandr as $file){
- if(in_array($file, [".", ".."]))
- continue;
- $type = mime_content_type("uploads/".$file);
- ?>
- <div class="uploaded-file-item">
- <?php if(strstr($type, "image/")): ?>
- <a href="uploads/<?= $file ?>" class="image-holder" target="_blank">
- <img src="uploads/<?= $file ?>" alt="">
- </a>
- <?php else: ?>
- <a href="uploads/<?= $file ?>" class="icon-holder" target="_blank">
- </a>
- <?php endif; ?>
- </div>
- <?php } ?>
- <?php endif; ?>
- </div>
- </div>
- </div>
- </div>
- </div>
- </div>
- </body>
- </html>
Custom Style
Here is the snippet of the custom cascading stylesheet or CSS for some of the designs of the interface. Save the file style.css.
- html, body{
- min-height:100%;
- width:100%;
- }
- #dd-field{
- width: 100%;
- height: 15vh;
- border: 2px dashed #b5b5b5;
- border-radius: 15px;
- overflow: auto;
- padding: 1em;
- display: flex;
- color: #b5b5b5;
- font-size: 1.5em;
- align-items: center;
- justify-content: center;
- }
- #upload-field{
- width: 100%;
- height: 45vh;
- border: 2px solid #b5b5b5;
- border-radius: 15px;
- overflow: auto;
- padding: 1em;
- display: flex;
- flex-wrap: wrap;
- }
- #upload-field:empty{
- align-items: center;
- justify-content: center;
- }
- #upload-field:empty:after{
- content:"Uploads Directory is empty";
- color: #b5b5b5;
- font-size: 1em;
- }
- .uploaded-file-item {
- width: 30%;
- margin: 1.5%;
- }
- .image-holder, .icon-holder {
- width: 100%;
- height: 10vh !important;
- background-color: black;
- border: #b5b5b5;
- border-radius: 5px;
- display: block;
- }
- .icon-holder{
- color: #fff;
- font-size: 3em;
- text-align: center;
- }
- .image-holder>img {
- width: 100%;
- height: 100%;
- object-fit: scale-down;
- object-position: center center;
- }
PHP API
The following snippet is a PHP script that uploads the files to the server. The script contains a simple logic for managing the files with duplicate filenames. This API will be executed by the JS HTTP Request. Save the file as upload_files.php
- <?php
- // Upload Directory
- $dir = "uploads/";
- /**
- * Check and Create Uploads Directory If not Existing Yet
- */
- $files = $_FILES['files'];
- $uploaded_files = [];
- $uploaded = 0;
- foreach($files['tmp_name'] as $k => $file){
- // Get the File Path Info
- // Get the filename
- $filename = $filepath_part['filename'];
- // Get the extension
- $extension = $filepath_part['extension'];
- // File Full Name w/ Extension
- $filefullname = $filename.".".$extension;
- // Content Mime Type
- // print($mime_type."<br>");
- // continue;
- /**
- * Check and Rename Filename if file already exists.
- */
- // temporary filename for checking duplicate
- $tmp_name = $filefullname;
- //Duplicate Iteration Number
- $i = 0;
- while(true){
- if($i > 0)
- $tmp_name = $filename." ($i)".".".$extension;
- $i++;
- }else{
- $filefullname = $tmp_name;
- break;
- }
- }
- /**
- * Move file to uploads directory
- */
- if($upload){
- $uploaded_files[] = ["filename" => $filefullname, "type" => $mime_type];
- $uploaded++;
- }
- }
- }
- if($uploaded == $total_files){
- "status" => 'success',
- "msg" => 'File has been uploaded successfully.',
- "uploads" => $uploaded_files
- ]);
- }elseif($uploaded > 0 && $uploaded < $total_files){
- "status" => 'success',
- "msg" => 'Some Files has been uploaded successfully and some has failed due to some reason.',
- "uploads" => $uploaded_files
- ]);
- }else{
- "status" => 'error',
- "msg" => 'Files has failed due to some reason.'
- ]);
- }
- }else{
- "status" => 'error',
- "msg" => 'No files sent on this request.'
- ]);
- }
JavaScript
Here is the JavaScript snippet that contains the main object of this tutorial. It has a script that implements the Drag-and-Drop functionality of the system and triggers to upload of the dropped files. Save the file as upload-file-dd.js.
- /**
- * Check if Upload Field is empty
- */
- window.onload = function(){
- if(document.getElementById('upload-field').innerText == ""){
- document.getElementById('upload-field').innerHTML = ""
- }
- }
- /**
- * Drag and Drop Field Drag Over CSS Change
- */
- document.getElementById('dd-field').ondragover = function(event)
- {
- this.style.borderColor = '#000';
- return false;
- }
- /**
- * Drag and Drop Field Drag Leave CSS Change
- */
- document.getElementById('dd-field').ondragleave = function(event)
- {
- this.style.borderColor = '#b5b5b5';
- return false;
- }
- /**
- * Drag and Drop Field Dropped Files
- * Process and Upload Files
- */
- document.getElementById('dd-field').ondrop = function(event)
- {
- event.preventDefault();
- document.getElementById('msg').innerHTML = "";
- this.style.borderColor = '#429ebe';
- var form_data = new FormData();
- var error = '';
- var drop_files = event.dataTransfer.files;
- // Allowed Files to Upload
- var valid_files = ['image/jpeg', 'image/png', 'video/mp4', 'application/gzip', 'image/gif', 'text/html', 'application/json', 'application/pdf', 'application/vnd.openxmlformats-officedocument.wordprocessingml.document', 'application/msword', 'text/csv', 'text/plain'];
- for(var count = 0; count < drop_files.length; count++)
- {
- if(!valid_files.includes(drop_files[count].type))
- {
- // In File type is not allowed
- error += `<div class="alert alert-danger rounded-0 mb-3"><b>${drop_files[count].name}'s</b> File Type is not valid.</div>`;
- }
- else
- {
- form_data.append("files[]", drop_files[count]);
- }
- }
- if(error != '')
- {
- // Return Error Message
- document.getElementById('msg').innerHTML = error;
- document.getElementById('dd-field').style.borderColor = '#b5b5b5';
- }
- else
- {
- // Display Progress Bar
- document.getElementById('upload-progress-holder').style.display = 'block';
- /**
- * Upload files
- */
- var httpRequest = new XMLHttpRequest();
- httpRequest.open("post", "upload_files.php");
- httpRequest.responseType = "json"
- httpRequest.upload.addEventListener('progress', function(event){
- /**
- * Update Progress Bar while Upload is inProgress
- */
- var percent_completed = Math.round((event.loaded / event.total) * 100);
- document.getElementById('upload-progress').style.width = percent_completed + '%';
- document.getElementById('upload-progress').innerHTML = percent_completed + '% completed';
- });
- httpRequest.addEventListener('load', function(event){
- // Upload Response
- response = httpRequest.response
- // console.log(response)
- if(!!response.status){
- if(response.status == 'success'){
- // IF File Upload is successfull
- if(!!response.msg)
- document.getElementById('msg').innerHTML = `<div class="alert alert-success rounded-0 mb-3">${response.msg}</div>`;
- if(!!response.uploads){
- /**
- * Add Newly Uploaded files to upload field
- */
- Object.keys(response.uploads).map(k => {
- var fname = response.uploads[k].filename
- var type = response.uploads[k].type
- var el = document.createElement("div")
- el.classList.add("uploaded-file-item")
- if(type.includes("image/") === true){
- el.innerHTML = `
- <a href="uploads/${fname}" class="image-holder" target="_blank">
- <img src="uploads/${fname}">
- </a>
- <div class="text-center">${fname}</div>
- `
- }else{
- el.innerHTML = `
- <a href="uploads/${fname}" class="icon-holder" target="_blank">
- <i class="fa-solid fa-file"></i>
- </a>
- <div class="text-center">${fname}</div>
- `
- }
- document.getElementById('upload-field').innerHTML = el.outerHTML + document.getElementById('upload-field').innerHTML
- document.getElementById('upload-field').scrollTop = 0
- })
- }
- }else if(response.status == 'error'){
- if(!!response.msg)
- document.getElementById('msg').innerHTML = `<div class="alert alert-danger rounded-0 mb-3">${response.msg}</div>`;
- }else{
- document.getElementById('msg').innerHTML = `<div class="alert alert-danger rounded-0 mb-3">An error occurred while uploading the files.</div>`;
- }
- }
- document.getElementById('dd-field').style.borderColor = '#b5b5b5';
- });
- httpRequest.send(form_data);
- }
- }
That's it! You can now test the application source code on your end. The upload directory will be automatically created upon uploading files for the first time using the application. I also provided the application's complete source code zip file with this article and it is free to download. You can download it by clicking the Download Button located below this article.
Snapshots
Main Interface
Successful File Upload
There you go! That's the end of this tutorial. I hope this Uploading Drag-and-Drop Multiple Files using JavaScript Tutorial helps you with what you are looking for and will be useful for your current and future projects.
Explore more on this website for more Tutorials and Free Source Codes.


